
Ciambellone della Nonna (Italian Grandmother’s Ring Cake)
- 7 hours ago
- 6 min read
Prep time: 25 minutes
Baking time: 45 to 55 minutes
Cooling time: 40 minutes
Total time: About 2 hours
Servings: 10 to 12
Difficulty: Easy
Oven: 350°F, 175°C
Pan: 10 inch, 25 cm ring pan or bundt style pan
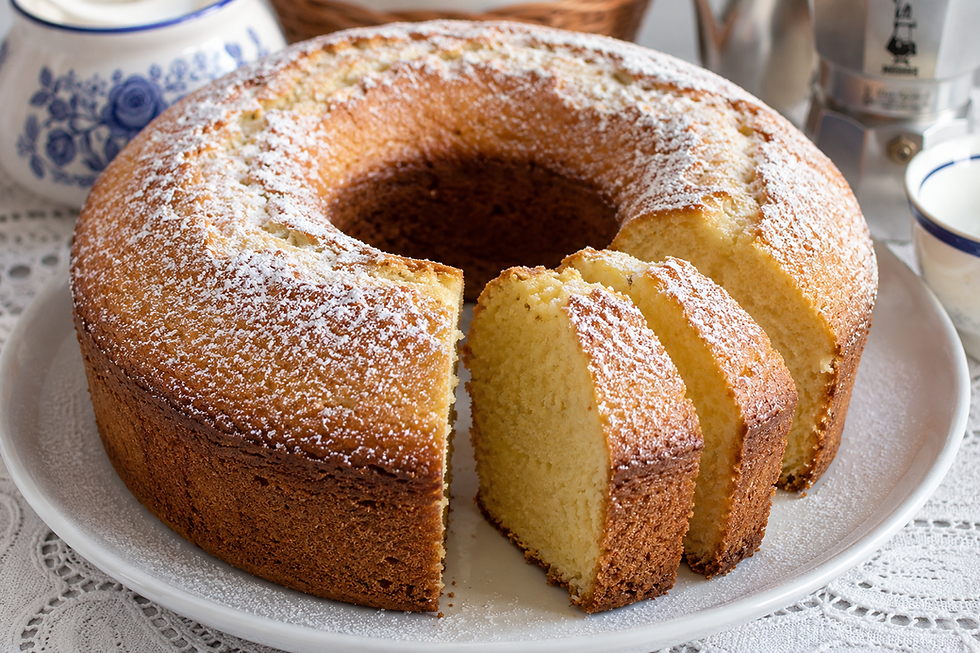
Ciambellone della Nonna is one of the most familiar cakes in the Italian home kitchen. It is the kind of cake traditionally prepared for breakfast, afternoon coffee, or a simple family dessert.
The word ciambellone refers to its large ring shape, but what really defines the cake is its texture. It should be tall, soft, fragrant, and tender, with enough structure to slice cleanly while remaining light enough to dip into coffee, milk, or cappuccino.
This version follows the classic home style approach with eggs, sugar, butter, milk, lemon zest, and vanilla. The goal is not an overly rich pastry shop cake. It should taste simple, clean, and homemade.
Ingredients
For the Cake
300 g all purpose flour
180 g granulated sugar
120 g unsalted butter, softened
4 large eggs, room temperature
150 ml whole milk, room temperature
16 g baking powder
Finely grated zest of 1 untreated lemon
1 teaspoon pure vanilla extract
1 small pinch fine sea salt
For the Pan
Unsalted butter, as needed
Flour, as needed
For Finishing
Powdered sugar, as needed
Mise en Place
Preheat the oven to 350°F, 175°C.
Position the rack in the center of the oven.
Butter the entire interior of the ring pan carefully, including the central tube.
Dust lightly with flour.
Rotate the pan so the flour reaches every surface, then tap out the excess.
This step is particularly important with ring pans because the central tube and decorative edges can make unmolding more difficult.
Bring the eggs, butter, and milk to room temperature before beginning.
Sift the flour and baking powder together.
Grate the lemon zest finely, taking only the yellow outer skin and avoiding the bitter white pith.
Step 1: Cream the Butter and Sugar
Place the softened butter and granulated sugar in a large mixing bowl.
The butter should be soft enough that a fingertip leaves an indentation, but it should not be melted or greasy.
Beat at medium speed for approximately 4 to 5 minutes.
Stop once or twice and scrape the sides and bottom of the bowl.
At the beginning, the mixture will look dense and yellow.
As air is incorporated, it should become paler, fluffier, and slightly increased in volume.
This aeration is important because it helps produce a lighter crumb.
Step 2: Add the Lemon Zest and Vanilla
Add the finely grated lemon zest and vanilla extract.
Mix for approximately 20 seconds.
The aroma should become immediately noticeable.
The lemon should perfume the cake without making it taste aggressively citrusy.
Step 3: Add the Eggs One at a Time
Add the first egg.
Beat until completely absorbed.
Scrape the bowl.
Add the second egg and repeat.
Continue in the same way with the remaining eggs.
Each egg should be fully incorporated before the next one is added.
This helps maintain a stable emulsion.
What to Look For
The mixture should remain creamy and smooth.
If it begins to look slightly curdled, add approximately 1 tablespoon of the measured flour and mix briefly before continuing.
Cold eggs are one of the most common causes of separation.
Step 4: Begin Adding the Dry Ingredients
Reduce the mixer speed to low.
Add approximately one third of the flour and baking powder mixture.
Mix only until most of the flour has disappeared.
Do not continue mixing unnecessarily.
Step 5: Add the Milk
Pour in approximately half of the milk.
Mix briefly.
Add another third of the flour.
Mix again.
Add the remaining milk.
Finish with the final third of the flour.
Stop the mixer as soon as the batter becomes homogeneous.
Step 6: Finish the Batter by Hand
Use a flexible spatula to scrape the sides and bottom of the bowl.
Fold the batter gently approximately 5 to 8 times.
This ensures that there are no pockets of flour or butter hidden at the bottom.
Do not overwork the batter.
Once flour is hydrated, excessive mixing begins developing gluten and can make the cake tougher.
What the Batter Should Look Like
The batter should be:
Smooth
Thick but pourable
Pale yellow
Creamy
Lightly glossy
When lifted with a spatula, it should fall back into the bowl in a thick ribbon rather than running like liquid.
Step 7: Fill the Ring Pan
Transfer the batter into the prepared pan.
Distribute it evenly around the ring.
Use a spatula to level the surface.
Make sure the batter has approximately the same depth all the way around the pan.
This helps the cake rise evenly.
Tap the pan gently on the counter once or twice.
Do not repeatedly bang it down because you do not want to remove too much incorporated air.
Step 8: Bake
Place the pan on the center rack.
Bake at 350°F, 175°C for approximately 45 to 55 minutes.
Do not open the oven during the first 35 minutes.
Opening too early can cause the cake to collapse before its internal structure has set.
At approximately 40 minutes, begin checking.
The surface should be golden.
The cake should have risen significantly.
The edges may begin pulling slightly away from the pan.
Insert a wooden skewer into the thickest part of the cake.
The Cake Is Ready When
The skewer comes out with a few dry crumbs.
There should be no wet batter.
The top should spring back gently when pressed with a fingertip.
If using an instant read thermometer, the center should register approximately 200 to 205°F, 93 to 96°C.
Step 9: Avoid Overbaking
If the top is already deeply golden but the center still requires additional baking, cover the cake loosely with aluminum foil.
Continue baking until fully cooked.
Do not leave it in the oven simply because the recipe says 55 minutes.
Every oven behaves differently.
The cake is ready when the structure and internal texture are correct.
Step 10: Cool Before Unmolding
Remove the cake from the oven.
Place the pan on a cooling rack.
Allow it to rest for 15 minutes.
Do not attempt to unmold it immediately.
A very hot ciambellone is still fragile and may tear.
After 15 minutes, run a thin knife around the outer edge and central tube if necessary.
Invert the cake carefully onto a rack.
Allow it to cool completely.
The Correct Texture
A properly made Ciambellone della Nonna should be tall and evenly risen.
The crumb should be fine and soft rather than dense.
It should hold together cleanly when sliced but remain tender enough to compress easily under the fingers.
The crust should be lightly golden and slightly firmer than the interior.
The aroma should be dominated by butter, lemon, vanilla, and eggs.
Common Mistakes
Using Melted Butter
Melted butter changes the structure and removes the benefit of creaming.
Use softened butter.
Adding All the Eggs at Once
This can destabilize the emulsion.
Add them individually.
Overmixing the Flour
Once the flour is incorporated, stop mixing.
Opening the Oven Too Early
The cake may collapse before its internal structure has stabilized.
Using Too Much Baking Powder
More baking powder does not necessarily create a better rise.
Too much can produce large irregular holes, an unpleasant taste, and a cake that rises quickly before collapsing.
Removing the Cake Immediately
Give the cake approximately 15 minutes in the pan before unmolding.
Finishing
Once completely cool, dust lightly with powdered sugar.
Do not cover the cake with heavy icing or frosting.
The traditional presentation should remain simple.
How to Serve
Serve Ciambellone della Nonna at room temperature.
For breakfast, cut a generous slice and serve with espresso, cappuccino, or warm milk.
For an afternoon snack, it pairs perfectly with coffee or tea.
It is also excellent lightly toasted the following day.
Storage
Keep the cake covered at room temperature for approximately 3 days.
Protect the cut surface so it does not dry out.
For longer storage, wrap individual slices and freeze them.
Allow frozen slices to thaw naturally at room temperature.
Approximate Nutrition
Per serving, based on 12 servings:
Calories: approximately 280 kcal
Protein: approximately 6 g
Carbohydrates: approximately 38 g
Fat: approximately 12 g
Sugar: approximately 17 g
Fiber: approximately 1 g
Chef Gianluca’s Notes
The most important technical point is the emulsion.
Room temperature butter, eggs, and milk help the batter remain smooth and stable.
The second key point is the final mixing stage.
Once flour enters the batter, use the lowest speed possible and stop as soon as the ingredients are combined.
The third key point is baking.
A Ciambellone should be fully cooked but never dry. Watch the final 10 minutes carefully.
Chef Gianluca’s Recommendation
Prepare this cake the day you plan to serve it for breakfast the following morning.
Once cooled, wrap it well and allow it to rest overnight.
By morning, the crumb will be settled, the lemon aroma will be more integrated, and the cake will slice beautifully.
Serve it simply with coffee, just as a classic Italian home cake should be served.
Chef Gianluca Deiana


Comments