
Italian Tuscan Pici with Meat Ragù | Pici al Ragù Toscano

A Tuscan meat ragù is not a Bolognese with a different accent. There is no milk in it and no cream, the wine is red rather than white, and the seasoning runs to bay and rosemary instead of nutmeg. It is built on a small soffritto, a good deal of beef, a little pork for fat, and three hours over the lowest flame the stove will hold.
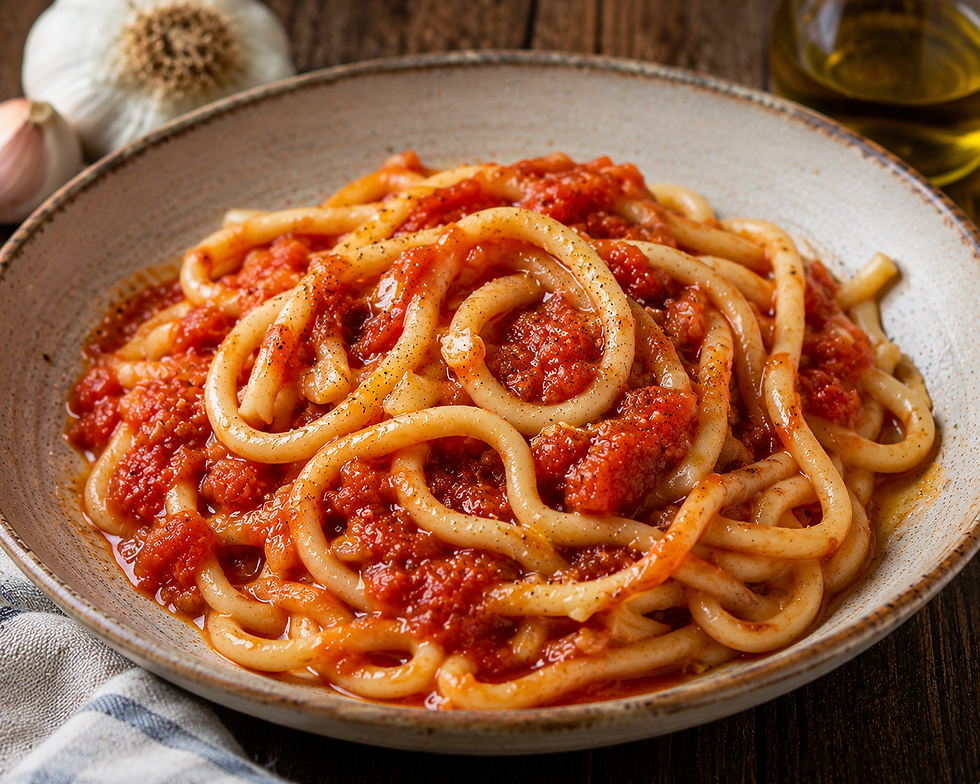
Pici are the thickest handmade strand in the Italian repertoire, flour and water alone, rolled out one at a time until each is about as thick as a pencil. That size is the reason a Tuscan ragù is chopped and reduced the way it is: a thin sauce would slide off a strand this wide and a smooth one would leave nothing to bite.
Yield: 4 servings. Prep: 55 minutes. Rest: 40 minutes. Cook: 3 hours 20 minutes. Total: about 5 hours. Difficulty: intermediate. Course: primo piatto. Region: Tuscany, from the Crete Senesi to the Maremma.
The Story
Meat was rare in the Tuscan countryside and the ragù records that fact. For most of the year a family made sugo finto, the false sauce, which is the same soffritto and the same long simmer with no meat at all, thickened instead with dried porcini or a spoon of tomato paste. The real ragù appeared on Sundays, on the feast of the local patron, and at the mietitura, the harvest meal when the farm fed everyone who had worked the fields.
When meat did go into the pot it came from the animals the region actually raised. Chianina cattle, the white breed of the valleys around Siena and Arezzo, and the Maremmana of the coastal plain were working animals first and reached the table old. Old working beef is lean, tough and full of connective tissue, a problem for a steak and an advantage for a three hour sauce: collagen is what gives a Tuscan ragù the clinging body a cook elsewhere would get from cream. The pork alongside supplies the fat the beef lacks.
The absence of milk is the clearest line between this sauce and the one from Emilia, and it is geography rather than preference: Tuscany is a country of sheep, not dairy cows, and the cheese on the table is pecorino. Butter was a northern thing; here everything begins in olive oil. What the sauce loses in softness it gains in savour, and the sharp pecorino grated over the plate does the job Parmigiano does further north, but louder.
Ingredients
For the pici
Durum wheat semola rimacinata, 2 cups (300 g)
Type 00 flour, 3/4 cup (100 g)
Warm water, about 100°F (38°C), 3/4 cup plus 1 tbsp (195 ml)
Extra virgin olive oil, 1 tbsp (15 ml)
Fine sea salt, 1/2 tsp (3 g)
Semola for dusting the tray, 1/2 cup (75 g)
For the ragù
Beef chuck or shin, coarsely ground or hand chopped, 12 oz (340 g)
Pork shoulder, coarsely ground, 7 oz (200 g)
Pancetta, finely chopped, 2 oz (55 g)
Yellow onion, finely diced, 1 medium (5 oz, 150 g)
Carrot, finely diced, 1 medium (3 oz, 80 g)
Celery stalk, finely diced, 1 (2 oz, 60 g)
Garlic clove, crushed, 1
Extra virgin olive oil, 3 tbsp (45 ml)
Dry red Sangiovese, 3/4 cup (180 ml)
Tomato passata, 1 1/2 cups (13 oz, 375 g)
Tomato paste, 1 tbsp (16 g)
Beef stock, hot, 1 1/2 cups (360 ml) or as needed
Bay leaf, 1, and one short sprig of rosemary
Fine sea salt, 1 1/2 tsp (9 g)
Freshly ground black pepper, to taste
For finishing
Coarse sea salt for the pasta water, 2 tbsp (35 g)
Pecorino Toscano stagionato, finely grated, 2 oz (55 g)
Extra virgin olive oil, 1 tbsp (15 ml)
Reserved pasta cooking water, about 1 cup (240 ml)
Preparation
Step 1
Mix and rest the pici dough. Combine the semola, the type 00 flour and the salt in a wide bowl, make a well, and pour in the warm water and the olive oil. Draw the flour in from the edges until no dry powder is left, then knead on an unfloured surface for a solid 10 minutes until the dough is smooth and springs back slowly. Wrap it and rest it at room temperature for 40 minutes, and start the ragù meanwhile.
Step 2
Sweat the soffritto. Cut the onion, carrot and celery as small and evenly as you can, no larger than a grain of rice. Warm the olive oil in a heavy pan, add the pancetta and let it render for 3 minutes, then add the vegetables and the crushed garlic. Cook over medium low heat for 12 to 15 minutes, stirring often, until the onion is translucent and faintly sweet. Do not let it brown.
Step 3
Brown the meat properly. Lift the soffritto into a bowl and raise the heat under the pan. Add the beef and pork in two batches, pressing each into a single layer and leaving it untouched for 3 or 4 minutes before breaking it up. You want a genuine crust and the brown film on the pan bottom. Crowding the pan drops the temperature and the meat boils grey, which costs the ragù most of its depth. Season with salt and pepper as the second batch browns.
Step 4
Deglaze with Sangiovese. Return the soffritto to the pan, stir in the tomato paste and cook it for 1 minute so its raw edge goes. Pour in the red wine and scrape the base hard with a wooden spoon while it bubbles, lifting every brown fragment into the sauce. Let it reduce until the pan is almost dry and the smell has turned from sharp alcohol to fruit, about 5 minutes.
Step 5
Add the tomato and settle the simmer. Stir in the passata, the bay leaf, the rosemary and half the hot stock, bring everything to a simmer, then drop the heat until the surface barely trembles, perhaps one bubble a second, and set the lid slightly ajar. A ragù at a true simmer toughens the meat and reduces too fast; one held at 185°F (85°C) softens the collagen slowly, which is the purpose of the long cooking.
Step 6
Cook it for three hours. Leave it alone apart from a stir every 20 minutes, adding hot stock a splash at a time whenever the surface looks dry. It is ready when the meat pulls apart under the spoon, the fat has risen and turned the sauce glossy, and a spoon dragged across the pan leaves a channel that fills in slowly. Remove the bay and rosemary, taste for salt and turn the heat off. It improves if it sits an hour, or overnight.
Step 7
Roll the pici. Flatten the rested dough into a disc half an inch thick, brush it with a little oil and cut it into strips a quarter of an inch wide. Roll one strip at a time under flat palms, working from the centre outward and moving the hands apart, until the strand is the thickness of a pencil and 10 to 12 inches long. Use almost no flour, since the dough needs friction to lengthen, and lay each strand on a semola dusted tray without letting them touch.
Step 8
Boil the pici and finish them in the sauce. Bring 5 quarts (4.7 litres) of water to a rolling boil and add the coarse salt, enough that it tastes clearly of the sea. Cook the pici 4 to 6 minutes from the return of the boil, until cooked through but firm at the core, and meanwhile warm 2 generous cups of ragù in a wide pan. Lift the pasta in with tongs, add a ladle of the cooking water and toss over medium heat for 60 to 90 seconds until the sauce grips every strand. Off the heat, add the olive oil and half the pecorino and toss once more.
Plating
Serve this in warm bowls, around 140°F (60°C). Pici hold a great deal of heat but the ragù stiffens quickly, and a cold bowl takes the gloss off it within a minute. Wide shallow bowls with a rim work best, since the pasta needs room to lie rather than a deep well to sit in.
Take the pasta out with tongs, a quarter at a time, and turn it once against the side of the bowl so it settles into a loose heap standing taller in the middle. Do not flatten it. Spoon the sauce left in the pan on top of the pasta, where it stays visible and hot, rather than spreading it to the rim.
Finish with the remaining pecorino and a few grindings of black pepper at the table, so the cheese arrives dry rather than already melted in. Nothing else is needed: this plate should look plainly of the Tuscan countryside.
Professional Technique
The defining technique is temperature control across three hours, and the target is the range in which collagen turns to gelatin without the muscle fibre drying out. That conversion runs from about 160°F (71°C) upward and accelerates as the temperature climbs, but the same heat squeezes water out of the meat. Holding the pot around 185°F (85°C) with the lid ajar keeps the conversion running while the escaping steam concentrates the sauce. A rolling simmer does it faster and gives dry grainy meat in a thin liquid.
Separating the browning from the sweating is the second. Soffritto vegetables want gentle heat and time, meat wants ferocious heat and a dry surface, and the two cannot be met in the same pan at the same moment. Lifting the vegetables out and returning them after the meat has coloured costs one bowl and buys the Maillard compounds that give the sauce its savour. It is the step most home versions skip.
The third is the ratio at the finish. Two cups of ragù to four portions looks mean in the pan and is exactly right on the plate, because the sauce is short and concentrated and the pasta takes up a third of it while you toss. More sauce gives pasta swimming in a bowl, and the cooking water can no longer bind the fat to the starch.
Texture and Moisture Control
Two textures have to be managed and they fail at different points. The meat goes tough if the pot runs hot in the first hour and dry if it runs long without stock, so keep the liquid level with the solids, topping up with hot stock rather than cold water. Judge it by the spoon, not the clock: the meat should collapse under light pressure and leave no fibrous threads.
The pasta is the other half. Pull the pici a minute before you would call them done, when the centre still gives a faint resistance under the tooth, because a strand this thick keeps cooking from its stored heat for two minutes after it leaves the water. Overcooked pici turn gummy and lose the chew that is their reason for being made by hand.
The cloudy cooking water is what joins the two. Its suspended starch emulsifies the rendered fat into a coating that clings to the pasta instead of pooling under it. Add it in stages, half a ladle first and more only if the sauce tightens too fast. Keep the pecorino off the flame: sheep cheese is high in protein and low in the salts that keep it fluid, so it strings over direct heat and melts smoothly off it.
Professional Mise en Place
The ragù is a long job done entirely in advance and the pasta a two minute one done at the last moment. Staging them that way is the whole of the organisation.
Equipment and tools
Heavy based pot or braising pan with a well fitting lid
Wide sauté pan for the final toss, large enough to hold all the pasta
Large pot, at least 6 quarts, and long tongs
Trays dusted with semola for the rolled strands
Ladle for the cooking water and a fine grater for the pecorino
Prepared ahead
Ragù, up to 3 days ahead and better on the second day, refrigerated
Soffritto vegetables diced and held covered, on the day
Pici dough mixed and kneaded up to 6 hours ahead, wrapped at room temperature
Pici rolled onto semola dusted trays up to 2 hours before service
Pecorino grated, stock hot and within reach
Service setup
Two cups of ragù warm in the sauté pan over low heat, loosened with stock if it has set
Pasta water at a full rolling boil and already salted
Bowls warming, tongs and ladle at the stove
Everyone seated before the pici go into the water
Chef Tips
Ask the butcher for a coarse grind, or chop the beef by hand. Fine mince packs into a paste during the long cook and leaves the sauce slightly pasty, with no pieces to catch on the pasta. Coarse meat keeps its identity through three hours and is the easiest upgrade to this sauce.
Make the ragù the day before. Overnight the fat sets on top, so you can lift off any excess, and the flavours settle in a way an hour cannot reproduce. Warm it gently with a splash of stock rather than reheating it hard.
Use a wine you would drink and use it red. A Sangiovese with real acidity keeps the sauce lively across a long reduction, while a soft low acid red leaves it flat and faintly sweet. What is left in the bottle goes into the glass.
If wild boar is available, replace the pork with the same weight of boar shoulder and add half an hour. That is the version cooked through the Maremma during the autumn hunt, and it takes the same pasta and wines with no other adjustment.
Common Mistakes
Crowding the pan when browning the meat. Too much meat at once drops the pan temperature below the point where a crust can form, so the meat releases its water and simmers grey. Work in two batches and leave each undisturbed for several minutes.
Adding milk or cream. That belongs to Bologna and turns a Tuscan ragù into something else, softening the savour the sauce is built on. The body you want comes from collagen and long reduction, not dairy.
Cooking the sauce at a real simmer. Visible rolling bubbles mean the pot is near boiling, which tightens the muscle fibre and dries the meat while the liquid disappears. Keep it at a bare tremble and give it the full three hours.
Dressing the pasta with too much sauce. A short concentrated ragù needs about two cups for four portions. More than that and the pasta sits in a pool and the dish loses the clinging texture that makes it worth the effort.
Wine Pairing
Vino Nobile di Montepulciano DOCG: The closest bottle to the pot and the one to open first. Its Prugnolo Gentile clone of Sangiovese gives firm acidity and a fine dusty tannin that scours the fat left by the pork and pancetta, while two years of ageing bring a dried plum and tobacco note that meets the long reduced tomato on its own terms.
Chianti Rufina DOCG: From the cooler hills northeast of Florence, and the sharpest of these four. The altitude keeps acidity high and alcohol moderate, which suits a sauce seasoned with bay and rosemary. It is leaner than the others and cuts rather than cushions, so pour it when the ragù has come out rich.
Brunello di Montalcino DOCG: The special occasion answer, and it needs a ragù with enough weight to justify it. The tannin is substantial and needs the gelatin and fat of a three hour sauce to soften against; poured with anything lighter it would flatten the plate. Decant it an hour ahead and serve at 62°F (17°C).
Carmignano DOCG: An old and unusual Tuscan blend, Sangiovese with a legally required share of Cabernet planted west of Florence since the eighteenth century. The Cabernet adds a dark cassis note and a firmer frame, which handles the browned crust on the meat better than pure Sangiovese does, while the acidity stays Tuscan enough for the tomato.
Storage & Reheating
Store the ragù and the pasta apart and dress only what you will eat. The sauce keeps in an airtight container in the refrigerator for 4 days and is better on the second. It freezes well for 3 months in single portions; thaw overnight in the refrigerator and warm it in a pan with a splash of stock, never in a microwave, which heats the fat unevenly and splits it out.
Uncooked pici should be frozen rather than refrigerated: spread them in one layer on a semola dusted tray, freeze solid, then bag them for up to 2 months and cook from frozen with two extra minutes. Dressed pasta keeps 2 days covered.
To reheat a dressed portion, use a sauté pan rather than a microwave. Add 2 tbsp (30 ml) of water or stock, cover, and set it over medium low heat for 3 to 4 minutes, shaking now and then. The steam loosens the sauce and warms the pasta through without returning it to a boil, which would take it past al dente. Uncover for the last 30 seconds and grate the pecorino on fresh.
Nutrition
Per serving, based on 4 servings:
Calories: 830 kcal
Total Fat: 34 g
Saturated Fat: 12 g
Trans Fat: 0 g
Unsaturated Fat: 20 g
Cholesterol: 115 mg
Sodium: 980 mg
Total Carbohydrates: 83 g
Fiber: 6 g
Total Sugars: 8 g
Added Sugars: 0 g
Protein: 45 g
Lactose: 0.4 g
Principal micronutrients: iron, zinc, vitamin B12, niacin, selenium, phosphorus, lycopene
These figures are estimates. Much of the salt in the pasta water is discarded rather than eaten, and the fat depends on how lean the beef is and whether the ragù was skimmed.




header.all-comments