
Spelt Focaccia | Focaccia di Farro

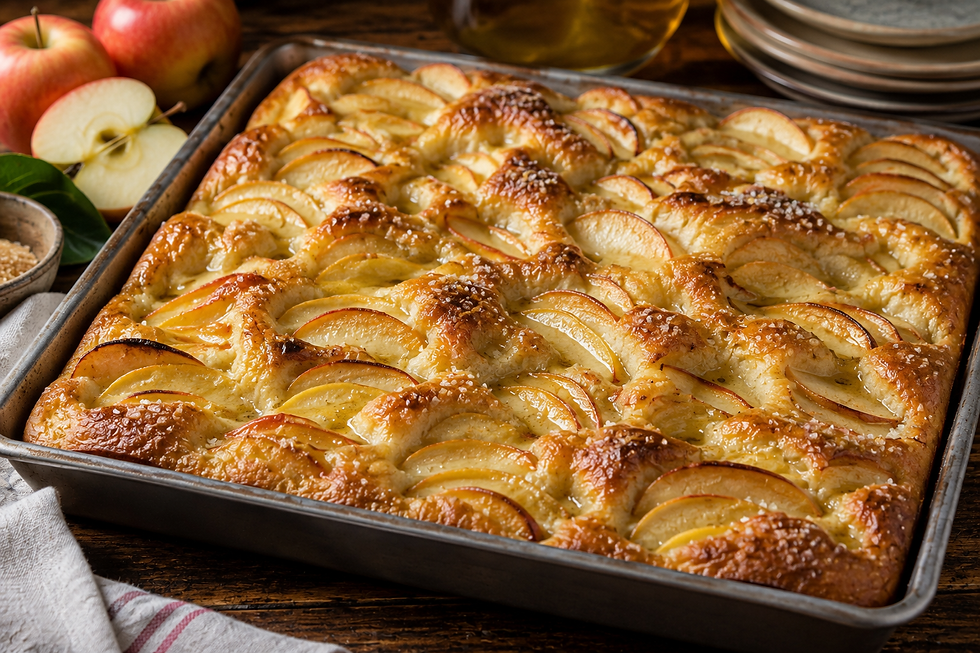
Spelt Focaccia is a tall, dimpled tray bread with a nutty crumb, a crackling golden base and the scent of rosemary and hot olive oil. It tastes of toasted grain and hazelnut in a way plain white focaccia never does.
Sixty percent of the flour is spelt and forty percent is strong wheat flour, and the dough is built with folds, not kneading. The recipe rewards patience and a careful eye more than strength.
Yield: 8 squares. Prep: 25 minutes. Fermentation: about 3 hours 30 minutes. Bake: 25 minutes. Difficulty: intermediate. Course: bread, appetizer or side dish. Region: central Italy and Liguria.
The Story
Farro is one of the most misunderstood words in the Italian kitchen. It is not one grain but three hulled wheats: farro piccolo, or einkorn, farro medio, or emmer, and farro grande, which is spelt, Triticum spelta. Spelt is the one bakers reach for, because it is the only one of the three whose flour behaves anything like bread flour. It has also been in Italian hands for a very long time. The Romans called the grain far, and the word survives inside farina, the ordinary Italian word for flour. The wedding rite of confarreatio, the oldest form of Roman marriage, sealed the couple with a cake of spelt shared before witnesses, and the legions marched on a porridge of it, the puls that fed the army long before wheat bread became common.
When high yielding soft wheat took over the Italian plains in the twentieth century, spelt retreated to places too steep, cold or poor for anything else. It survived in the Garfagnana valleys of northern Tuscany, where the farro has its own protected geographical indication, on the high plateaus around Monteleone di Spoleto in Umbria, and in scattered fields in Abruzzo and the Marche. Families kept it because it grew on thin mountain soil without much help, and because a bowl of farro soup could carry a household through winter. For most of a century it was a peasant grain that city people had forgotten. Its revival over the last few decades is one of the quiet successes of Italian food, driven by farmers who refused to let the seed disappear.
The flavour is the reward for that stubbornness: sweeter, nuttier and more aromatic than modern wheat, with a faint hazelnut note that rosemary and olive oil lift instead of covering. Bakers in central Italy have long blended it with stronger flour, a practical habit as much as a taste choice, and that habit is the backbone of this recipe.
Focaccia comes from another tradition entirely. The word descends from the Latin panis focacius, bread baked on the focus, the hearth, and Liguria turned it into an art of oil, salt and brine, most famously in Genoa, where it is eaten for breakfast dipped in milk or coffee. Putting spelt into a Ligurian style tray bread joins two old habits of the Italian table, the mountain grain and the coastal hearth loaf, and the result tastes at home in both.
Ingredients
For the dough
Spelt flour, white or lightly sifted, 2 1/2 cups (300 g)
Strong bread flour, 1 1/2 cups plus 1 tbsp (200 g)
Water at 75°F (24°C), 1 1/2 cups plus 1 tbsp (370 ml)
Instant yeast, 3/4 tsp (2.5 g)
Fine sea salt, 1 3/4 tsp (10 g)
Honey, 1 tsp (7 g)
Extra virgin olive oil, 2 tbsp (30 ml)
For the pan
Extra virgin olive oil, 3 tbsp (45 ml)
Dark metal baking pan, 9 by 13 inch (23 by 33 cm)
For the brine
Warm water, 1/4 cup (60 ml)
Extra virgin olive oil, 2 tbsp (30 ml)
Fine sea salt, 1/2 tsp (3 g)
For finishing
Fresh rosemary, leaves from 3 sprigs, about 1 tbsp
Flaky sea salt, 1 tsp (3 g)
Extra virgin olive oil, 1 tbsp (15 ml)
Weigh the flour if you can. Spelt flour packs differently from wheat flour, and a measuring cup can vary by 20 percent. Spelt is sold as white, semi whole and whole. White or lightly sifted gives the most tender crumb, while semi whole gives a darker, nuttier one. Any strong flour with 12 to 13 percent protein works for the wheat portion.
Preparation
Mix the dough just until it comes together
Stir the yeast and honey into the water in a large bowl. Add both flours, the 2 tablespoons of oil and the salt, and mix with a wet hand or a spatula for about 2 minutes, until no dry flour remains. The dough will look shaggy, sticky and unfinished, and that is correct. Cover the bowl and leave it at 75°F (24°C) for 30 minutes so the flour can absorb the water.
Fold the dough three times at 30 minute intervals
With a wet hand, lift one edge of the dough, stretch it upward until it resists, and fold it over the center. Turn the bowl a quarter turn and repeat until all four sides are folded, about 8 stretches in all. Cover and rest for 30 minutes, then repeat. Do three sets in total. The dough should feel smoother and springier after each round, and after the third it should sit as a taut, slightly domed mass.
Let the dough rise until it is airy but not slack
After the last fold, cover the bowl and let the dough rise for about 1 hour 15 minutes more at 75°F (24°C). It is ready when it has grown by roughly 60 to 70 percent, looks domed and wobbly, and shows bubbles at the edge against the bowl. Do not wait for it to double. Watch the dough, not the clock, since a warm kitchen shortens the rise and a cool one stretches it.
Oil the pan and stretch the dough into the corners
Pour 3 tablespoons of oil into the pan and spread it over the base and up the corners. Tip the dough into the pan with a wet scraper, turn it once to coat both sides, and stretch it gently toward the corners. If it springs back, cover it for 10 minutes and try again. Never tear it. Cover the pan and proof for 40 to 45 minutes, until puffy and jiggly.
Dimple the dough, add the brine and the rosemary
Set a rack in the lower third of the oven and heat it to 450°F (230°C). Whisk the warm water, 2 tablespoons of oil and 1/2 teaspoon of salt into a cloudy brine. Oil your fingertips and press straight down through the dough to the base of the pan, all over, making deep dimples. Pour the brine over the top so it pools in the wells, then press the rosemary leaves into the surface.
Bake until deep gold
Bake for 22 to 25 minutes, rotating the pan once at the halfway point, until the top is deeply golden and the center reads 205°F (96°C) on an instant read thermometer. Spelt browns faster than wheat, so check at 18 minutes and tent the pan with foil if the rosemary darkens too quickly.
Finish with oil and salt, then rest
Slide the focaccia onto a wire rack at once. Brush it with the last tablespoon of oil and scatter the flaky salt over it while the crust is still hot. Let it stand for at least 15 minutes before cutting, so the steam finishes setting the crumb and the base stays crisp. Cut only when the squares hold their shape under the knife and the aroma of rosemary and toasted grain fills the kitchen.
Plating
Serve the focaccia warm, not hot, on a wooden board. Cut it into 8 squares with a serrated knife, using a gentle sawing motion so the crust does not shatter and the crumb does not compress. Keep the pieces in their grid on the board so the shape of the tray stays visible, and let guests break off their own square.
Set a small bowl of good olive oil beside it, with a wedge of fresh ricotta or stracchino, sliced ripe tomatoes, or marinated artichokes. For a plated antipasto, split a square through the middle, toast the cut sides, and serve it under a spoonful of burrata with a few drops of oil. Use room temperature plates and pass the flaky salt at the table. A few rosemary leaves crushed over the oil bowl make the presentation feel finished.
Professional Technique
Spelt gluten is the whole technical problem, so it helps to be exact about it. Spelt does contain gluten, and plenty of it, but the proteins form a network that is more soluble and more extensible than the one in modern bread wheat. It develops quickly, in a fraction of the time wheat needs, and then it breaks. A spelt dough kneaded for 10 minutes like a wheat dough passes its peak, the network tears, and the dough turns soft, sticky and slack, and no extra flour brings it back.
That is why this recipe builds strength with folds at intervals, not with kneading. Each fold aligns the strands and traps gas, and each 30 minute rest lets the network relax and rebuild without being stressed. Three sets of folds do what kneading cannot do without damage. Always fold with wet hands, so the dough is stretched and never dragged.
Fermentation needs the same attention, because spelt goes from ready to collapsed within a short window, often 20 to 30 minutes. The signs are in the surface. The right point is a dome with a few bubbles at the edge, a dough that jiggles like a set custard when you shake the bowl, and a wet fingertip dent, half an inch deep, that fills back slowly and only partly. If the dent stays completely, or the surface turns flat and glossy with large bubbles breaking, the peak has passed. Go to the pan slightly early rather than late.
The 40 percent of strong wheat flour is the safety margin. Its tougher gluten holds gas longer, so the dough tolerates an extra 15 minutes or a warm kitchen without falling apart, while the spelt still supplies most of the flavour.
Texture and Moisture Control
The target is a crackling, oil fried base, a crumb that is open but tender and slightly moist, and a top that is crisp on the ridges and soft in the wells. Hydration of about 74 percent is high enough to open the crumb, but spelt absorbs water slowly, so the dough feels wetter at the start than at the end. Judge it after the first rest, never before.
The pan oil does the frying. Three tablespoons under the dough turn the base into a golden, crunchy layer, and a dark metal pan carries more heat into it than glass or ceramic. The brine keeps the surface moist during the first minutes of baking, so the top sets into a thin, shiny crust instead of a dry skin, and it seasons the dimples evenly. A lower rack keeps the base crisp while the top browns.
Cooling matters as much as baking. The crumb is still full of steam when it leaves the oven, so move it to a rack at once. Left in the pan, the base steams and turns soft. Give it 15 minutes before cutting, and do not wrap it until it is fully cold, or the crust turns leathery.
Professional Mise en Place
Equipment and tools
Large bowl, spatula and a bench scraper
9 by 13 inch (23 by 33 cm) dark metal pan
Instant read thermometer and a wire rack
Serrated knife for cutting
Wet towel or plastic wrap to cover the bowl and the pan between stages
Small bowl of water beside the bowl, for wetting hands during the folds
Prepared ahead
Flours weighed and the rosemary leaves picked, up to 1 day ahead
Brine mixed and kept at room temperature
Dough mixed the evening before and refrigerated, if you prefer a slower schedule
Pan oiled and the oven rack positioned before the final proof begins
Board wiped and the serving oil poured into a small dish
Service setup
Oven fully heated for 20 minutes before the pan goes in
Oil, flaky salt and brush lined up at the rack
Board, knife and plates ready before the focaccia leaves the oven
Timer set for the halfway rotation and a second one for the 15 minute rest
Cheese, tomatoes or vegetables sliced only after the bread is out, to serve them fresh
Chef Tips
Use a thermometer for the water and the room. At 75°F (24°C) the schedule above holds, and every 5°F (3°C) of warmth cuts the rise time by about a quarter. In a cool kitchen, place the bowl in an oven with only the light on.
Choose spelt flour from a mill with turnover. Old flour smells flat and tastes bitter, and the bitterness shows in a plain bread. Store the bag in the freezer if you bake only now and then.
Use fresh rosemary and press it into the dough. Loose sprigs on top scorch and turn acrid, while pressed leaves stay protected by the oil. Garlic can be added as thin slices under the rosemary, but keep them small.
Pour the oil generously, and use a fruity extra virgin oil for finishing. It is a bread where the oil is tasted, so a flat oil is a flat focaccia. Taste a spoonful before you pour it.
Common Mistakes
Dimpling too lightly. Shallow dents fill back in during baking and the brine runs off. Press through to the pan every time.
Skimping on the pan oil. Too little oil gives a pale, dry base that sticks instead of frying. Three full tablespoons are the minimum.
Baking in a glass or ceramic dish. It conducts heat slowly and produces a soft, pale bottom. Use a dark metal pan.
Using dried rosemary. It burns and turns bitter in 450°F (230°C) heat. Use fresh leaves, pressed in.
Cutting it straight from the oven. The crumb is still setting and it compresses into gum under the knife. Wait 15 minutes.
Baking on the middle rack. The base stays pale while the top darkens, and the crackling bottom never forms. Bake in the lower third.
Leaving out the brine. Without it the surface dries before the crumb has risen, and the top turns pale and papery. Pour it generously so it pools in the dimples.
Wine Pairing
Vermentino di Gallura DOCG: A saline, citrus driven white from the granite of northern Sardinia. Its crisp acidity cuts the olive oil, and its faint bitter almond finish runs alongside the toasted spelt crust. The herbal edge of a good bottle echoes the rosemary without competing with it.
Vernaccia di San Gimignano DOCG: A dry Tuscan white with firm structure, green almond and a mineral finish. Its bitter note meets the hazelnut sweetness of the spelt, and its acidity keeps each bite of an oily crumb clean.
Trento DOC: A dry metodo classico with fine bubbles and brisk acidity. The bubbles scrub the oil from the palate between bites, while the brioche notes from time on the lees mirror the toasted crust. It is the best choice for focaccia served as an aperitivo, before a larger meal or on its own with friends.
Verdicchio dei Castelli di Jesi Classico Riserva DOCG: A dry white from the Marche with lemon, almond and a saline, slightly bitter finish. The extra time in the cellar gives it enough body for a rich crumb, and its acidity lifts the oil and salt on each square. It is a good match when the focaccia is served with ricotta.
Rossese di Dolceacqua DOC: A light Ligurian red with low tannin, red cherry and a peppery, herbal lift. It suits the coastal roots of focaccia, stands up to the rosemary and salt without weight, and is excellent slightly cool with a plate of cheese and cured meats.
Storage & Reheating
Keep the focaccia at room temperature, loosely covered with a clean cloth, for up to 1 day. Plastic softens the crust, so avoid sealing it while it is still warm. It is at its best within 6 hours of baking.
For longer storage, cut it into squares, wrap each one tightly and freeze for up to 2 months. Refrigeration is not recommended, since it stales the crumb quickly. Reheat at 350°F (175°C) for 8 to 10 minutes directly on the oven rack, straight from frozen or from room temperature, until the crust crackles again.
Day old focaccia is not wasted. Cut it into cubes and toast them for croutons, tear it into a panzanella, or split it and grill it with a slice of cheese. The nutty spelt flavour holds up very well in all of these.
Nutrition
Per serving, based on 8 squares:
Calories: 320 kcal
Total Fat: 11 g
Saturated Fat: 1.6 g
Trans Fat: 0 g
Unsaturated Fat: 9 g
Cholesterol: 0 mg
Sodium: 620 mg
Total Carbohydrates: 46 g
Fiber: 3 g
Total Sugars: 1 g
Added Sugars: 1 g
Protein: 8 g
Lactose: 0 g
Principal micronutrients: manganese, niacin, iron, zinc, magnesium, vitamin E
These figures are estimates, and they vary with the exact amount of oil left in the pan and the brine that runs off during baking.




Comments