
Genoese Focaccia | Focaccia Genovese Fügassa
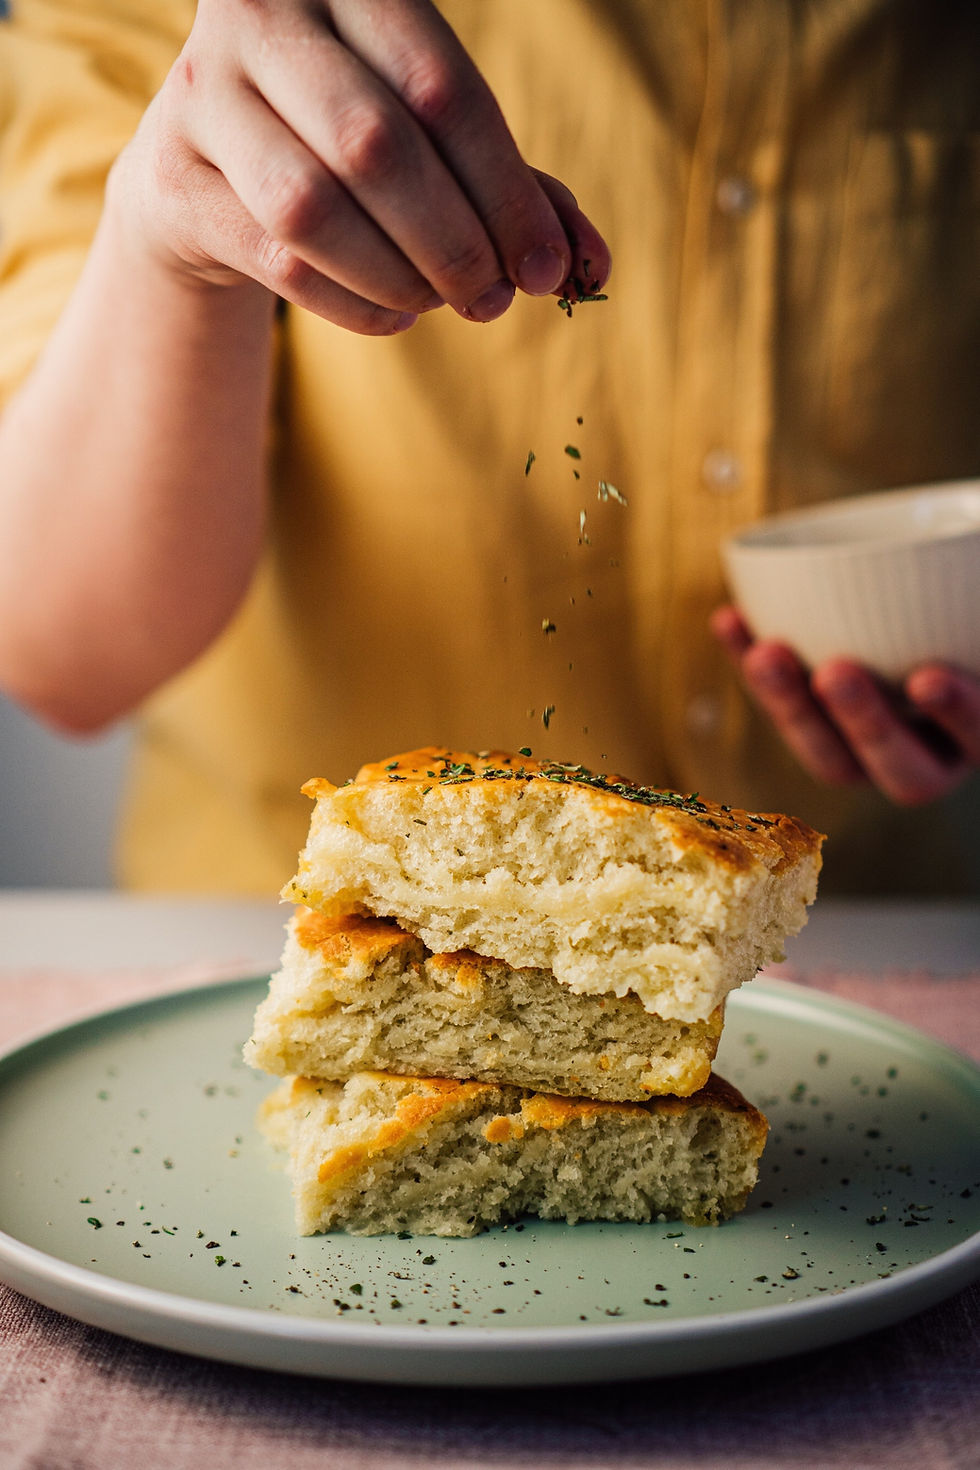
Fügassa is the flat bread of Genoa, and it looks nothing like the tall, cakey focaccia sold abroad. It stands about an inch high, chewy and glossy with oil, pitted with deep dimples that hold small pools of salty brine. Genoese bakers eat it at breakfast, dipped in milky coffee, as happily as at lunch. This version follows that tradition in an ordinary home sheet pan.
Yield: 8 pieces. Prep: 30 minutes. Rise: about 3 hours. Bake: 20 to 25 minutes. Total: about 4 hours. Difficulty: intermediate. Course: bread and snack. Region: Liguria, Genoa.
The Story
Flat breads baked on a hot hearth are as old as Mediterranean ports, and the word focaccia itself comes from the Latin panis focacius, bread cooked on the focus, the hearth. What set Genoa apart was not the idea of a flat bread but the oil poured over it. Ligurian olive oil, pressed from the small Taggiasca olives grown on the terraced hills behind Imperia, is pale, mild and faintly sweet, and it reached the city by the barrel. A bread that takes so much oil could only be made where oil was plentiful, and in Genoa it always was.
In the old quarters around the port, bakers called fugassé lit their ovens before dawn, and the first trays went straight to dockworkers, market porters and fishermen. They ate it standing up, torn from a sheet wrapped in paper, often with a glass of white wine, which the Genoese still consider a perfectly respectable way to begin a morning. The most surprising custom is dipping a piece of fügassa into cappuccino. Visitors are startled, yet the salt and oil against sweet milk work on the same principle as bacon against maple syrup, and nobody in Genoa thinks twice about it.
The bread also travelled well. Genoese sailors carried it on short coastal runs because the oil kept the crumb from drying out, and families still slice it in half for sandwiches with mortadella, stracchino or fresh cheese. It should not be confused with focaccia di Recco, the paper thin cheese filled bread from a village down the coast, nor with the thick Apulian pan bread topped with tomatoes. Fügassa is its own thing, defined by a soft crumb, a golden crust and a brine that pools in the dimples like small salt lakes.
Today the tradition lives on in the focaccerie of Genoa, small shops where trays come out of the oven all morning and the bread is cut to order and sold by weight. Schoolchildren still buy a rectangle for their mid morning snack, office workers grab one on the way to the bus, and grandmothers argue about which bakery has the best crumb. Ask ten Genoese where to find the best fügassa and you will hear ten answers, each delivered with complete certainty and a slight air of pity for anyone who disagrees.
Ingredients
For the dough
Bread flour, 4 cups (500 g)
Lukewarm water, 1 1/3 cups (320 ml)
Instant dry yeast, 1 1/2 tsp (5 g)
Honey or barley malt syrup, 1 tsp (7 g)
Fine sea salt, 2 tsp (12 g)
Extra virgin olive oil, 3 tbsp (45 ml)
For the pan
Ligurian extra virgin olive oil, 3 tbsp (45 ml)
Sheet pan, 12 x 16 inch (30 x 40 cm), dark metal, with 1 inch (2.5 cm) sides
For the brine
Cool water, 1/3 cup (80 ml)
Extra virgin olive oil, 1/3 cup (80 ml)
Fine sea salt, 1 1/2 tsp (9 g)
For finishing
Extra virgin olive oil, 1 tbsp (15 ml)
Flaky sea salt, 1 tsp (3 g)
For serving, optional
Mortadella, thinly sliced, 4 oz (115 g)
Fresh stracchino cheese, 6 oz (170 g)
Taggiasca olives, 1/2 cup (75 g)
Milky coffee or a glass of dry white wine, to accompany
Oven temperature: 450°F (230°C), with the rack in the lower third. Fresh yeast, 1/2 oz (15 g), can replace the instant yeast. Use a mild extra virgin olive oil throughout, and measure the brine oil separately from the pan oil.
Preparation
Mix and knead the dough
Stir the yeast and honey into the lukewarm water and let it stand for 5 minutes until faintly foamy. Combine the flour and salt in a large bowl, pour in the yeast water and the 3 tablespoons of oil, and mix until no dry flour remains. Turn the dough onto the counter and knead for 8 to 10 minutes. It will be soft and a little tacky at first, then smooth and elastic. Resist the urge to add flour, because a slightly wet dough gives the open crumb you want. If you use a stand mixer, knead on low speed with the dough hook for 6 minutes, then finish by hand for a minute to judge the texture.
Give the dough its first rise
Oil a clean bowl, set the dough inside and turn it once so the surface is coated. Cover with a damp cloth and let it rise at room temperature, around 75°F (24°C), for about 1 hour, until it has nearly doubled. Fold the edges into the center four times, cover again and rest for 20 minutes. This fold builds strength without extra kneading and makes the dough easier to stretch.
Stretch the dough into the pan
Pour the 3 tablespoons of pan oil into the sheet pan and tilt it so the oil covers the whole bottom. Lay the dough in the pan and press it outward with oiled fingertips toward the corners. It will spring back, so stop after a minute, cover it and rest 15 minutes, then stretch again until it reaches the edges. Turn the dough once in the oil so the top is glossy.
Let the dough rise in the pan
Cover the pan loosely and leave it in a warm corner for 1 to 1 1/2 hours, until the dough is puffy, jiggles when you shake the pan, and is about twice its original height. Do not rush this rise. A dough that has not risen fully will bake dense and its dimples will refuse to hold a shape. In a cool kitchen this can take a full 2 hours, and the dough, not the clock, is the guide.
Dimple to the metal and pour the brine
Whisk the water, oil and salt for the brine until cloudy. With oiled fingers, press straight down into the risen dough at close intervals until your fingertips touch the bottom of the pan, so each hole is a true well and not a shallow dent. Pour the brine evenly over the surface and tilt the pan gently. It will run into the dimples and collect there. Let the pan rest, uncovered or loosely covered, for 20 to 30 minutes.
Bake until two toned
Heat the oven to 450°F (230°C) with a rack in the lower third. Bake the fügassa for 20 to 25 minutes, until the ridges are deep gold, the edges are crisp and the dimples remain pale and soft. Rotate the pan halfway through if your oven runs uneven. Remove the pan, brush the top with 1 tablespoon of fresh oil and scatter the flaky salt. Slide the focaccia onto a rack after 5 minutes so the base does not steam. Let it cool for another 10 minutes before you cut it, so the crumb can settle.
Plating
Serve fügassa warm, not hot, about 10 minutes out of the oven, when the crumb has set but the oil is still fragrant. Cut it with a sharp knife or a pizza wheel into 8 rectangles and stack them slightly overlapping on a wooden board lined with parchment, so the underside of each piece stays crisp.
For breakfast, bring a cup of frothy milky coffee to the table. At an aperitivo, add slices of mortadella, fresh stracchino cheese and a small dish of Taggiasca olives. Leave a small pitcher of good oil nearby, and skip any topping that would compete with the bread's salty surface. Present it plainly on the board, since the dimpled, golden surface needs no decoration and looks best when it is left alone.
Professional Technique
The whole character of fügassa comes from one gesture: the dimples are pressed with the fingers into the risen dough until they touch the metal of the pan, and only then is the brine poured. The holes must reach the bottom, and the brine must stay inside them. Shallow dents disappear in the oven, but a hole that reaches the pan holds a real pool of liquid against the hot metal.
In the oven that brine does two jobs. The water in each well turns to steam beneath and around the crumb, cooking the bread from inside the hole outward and keeping it moist and soft. The dry, oily ridges between the wells never touch the water. They fry in the oil and brown into a crisp, golden crest. This is why the surface bakes on two levels, pale and tender in the hollows, dark and crunchy on the peaks. One tray, one bake, two textures.
The ratio is equal volumes of water and oil, here 1/3 cup (80 ml) of each with 1 1/2 teaspoons of salt. Water supplies the steam and dissolves the salt, so the seasoning reaches the crumb. Oil floats above it and coats the ridges. More water gives a wet, gummy crumb and a pale crust. More oil gives a greasy bread that fries flat.
The brine goes on before the last rise, not right before the oven. In that final rest the dough absorbs some of the liquid into the walls of each hole, the salt spreads through the crumb, and the oil film settles across the ridges. The rising dough lifts around the wells rather than closing them. Pour the brine just as the pan goes into the oven and it runs off the ridges, the holes spring shut, and the two level surface is lost.
Texture and Moisture Control
Texture in fügassa is a balance between moisture and fat. A hydration of about 64 percent keeps the dough slack enough to open into a soft, irregular crumb, while the oil in the dough and pan coats the gluten strands and tenderizes the bite. Too little water and the crumb turns tight and bready. Too much and the dough will not hold its shape. Kneading should stop when the dough is smooth and springy, since overworked gluten makes the bread tough and rubbery instead of tender.
Heat matters as much as hydration. A dark metal pan conducts heat quickly, browning the base in the oil until it crisps at the edges, which is why a thin glass dish or a nonstick tray will not do. The high oven temperature sets the crust before the brine has finished steaming, so the top browns while the crumb below stays damp.
Once the tray is out, the structure changes fast. The brine still trapped in the hollows migrates into the crumb as it cools, so cut the focaccia while warm, not straight from the oven and not after an hour. Move it from the pan to a rack after 5 minutes so the base does not steam in its own oil and turn soft and heavy.
Professional Mise en Place
This is a slow bread with a short list of ingredients, so mise en place is about timing and temperature, not organization. Plan the day backward from the moment the tray leaves the oven, and give every rest its full time. Nothing here needs to be rushed, but nothing can be skipped.
Equipment and tools
Dark metal sheet pan, 12 x 16 inch (30 x 40 cm)
Large bowl, damp cloth and a bowl scraper
Small whisk and a jug for the brine
Sharp knife or pizza wheel and a cooling rack
Pastry brush for the finishing oil and a kitchen timer
Prepared ahead
Dough mixed and kneaded, 3 to 4 hours before serving
Brine whisked and held at room temperature until needed
Oil measured out for the dough, the pan and the finishing
Serving board, parchment and any accompaniments sliced and covered
Service setup
Oven at full temperature 30 minutes before baking
Dimpling done and brine poured before the final rest
Board, knife and finishing salt ready at the pass
Chef Tips
Oil your fingers, not just the pan. A film of oil on your hands stops the dough sticking as you stretch it and dimple it, and it makes the holes cleaner. Keep a small bowl of oil beside you and re oil your fingertips every few presses, since dough that sticks to a finger tears a dimple instead of forming it.
Use a Ligurian or other mild extra virgin oil for the pan and the brine. A peppery, bitter Tuscan oil overpowers the flavor of the dough. Taste the oil on a spoon first. If it makes you cough or tastes bitter, save it for a robust salad.
Judge the rise by touch. Press a fingertip lightly into the dough, and if the dent slowly springs halfway back, it is ready to dimple.
For deeper flavor, ferment the dough overnight in the refrigerator, then bring it to room temperature for 1 hour before stretching it into the pan. The slow, cold fermentation gives a more complex, slightly sweeter crumb, and it moves most of the work to the day before.
Common Mistakes
Dimpling too shallowly. Dents that stop halfway simply puff away in the oven. Push until you feel the pan, or the brine has nowhere to sit. Use all four fingertips and keep the holes about 1 inch (2.5 cm) apart.
Skipping the brine or using the wrong ratio. Without it the crumb bakes dry and pale. Keep water and oil in equal volumes, with enough salt to taste seasoned.
Pouring the brine right before baking. It runs off the ridges and the holes spring shut. Pour it before the last rise so it soaks in as the dough finishes rising.
Using a shiny or thin pan. It reflects heat and never crisps the base. A dark, heavy metal pan browns it in the oil. If you only own a light pan, bake on a preheated baking steel or an upturned hot sheet.
Rushing the rise. Underproofed dough bakes dense and tight. Wait until it is puffy and wobbly, and do not trust the clock over the dough.
Cutting it too early. Slice a focaccia straight from the oven and the steam collapses the crumb into a gummy paste. Let it rest on a rack for at least 10 minutes first.
Wine Pairing
Riviera Ligure di Ponente Pigato DOC: The bottle Genoa itself pours with focaccia. Its brisk acidity cuts the olive oil, and its saline, herbal finish echoes the brine in the dimples. The wine also carries a fresh herbal note of marjoram and basil that belongs to the same coastline as the bread.
Cinque Terre DOC: A dry, mineral white from steep coastal terraces. Its lean body and salty edge refresh the palate between oily, crisp ridges and soft hollows. Its mineral firmness cuts through the fat without adding weight. Serve it well chilled, at about 46°F (8°C).
Vermentino di Gallura DOCG: Vermentino is grown along the Ligurian coast too. This Sardinian version adds citrus and a faint bitter almond note that flatters the toasted crust. Its rounder texture suits a thick, oily piece from the center of the tray.
Rossese di Dolceacqua DOC: A light Ligurian red with soft tannin, red cherry and dried herb. Serve it slightly cool with focaccia and cured meats, where it will not overwhelm the bread. Chill it lightly, for 30 minutes, to keep the fruit bright against the salt.
Trento DOC: A dry metodo classico sparkling wine. Fine bubbles and crisp acidity lift the oil from the palate, making each bite of warm focaccia taste fresh again. It is the best choice for a party, with the tray cut into small squares.
Storage & Reheating
Fügassa is best the day it is baked. Keep leftovers loosely wrapped in parchment or a clean cloth at room temperature for up to 24 hours. Airtight plastic traps moisture and softens the crust. If you plan to make a sandwich with the leftovers, split the piece horizontally and fill it just before eating so the crumb stays firm.
For longer storage, cut the cooled focaccia into pieces, wrap them tightly and freeze for up to 2 months. Thaw at room temperature for 1 hour, then reheat in a 375°F (190°C) oven for 8 to 10 minutes on a rack, until the ridges crisp again. Refrigeration dries the crumb quickly, so avoid it. A microwave turns the crust rubbery. Day old fügassa also makes excellent croutons, torn into pieces and toasted with a splash of oil.
Nutrition
Per piece, based on 8 pieces:
Calories: 330 kcal
Total Fat: 15 g
Saturated Fat: 2 g
Trans Fat: 0 g
Unsaturated Fat: 13 g
Cholesterol: 0 mg
Sodium: 480 mg
Total Carbohydrates: 42 g
Fiber: 2 g
Total Sugars: 1 g
Added Sugars: 1 g
Protein: 7 g
Lactose: 0 g
Principal micronutrients: iron, thiamin, niacin, folate, vitamin E
These figures are estimates and will vary with the brand of flour and the exact amount of oil that the crumb absorbs.


Comments