
Italian Extra Soft Milk Cake with Gianduia Cream | Torta al Latte con Crema Gianduia

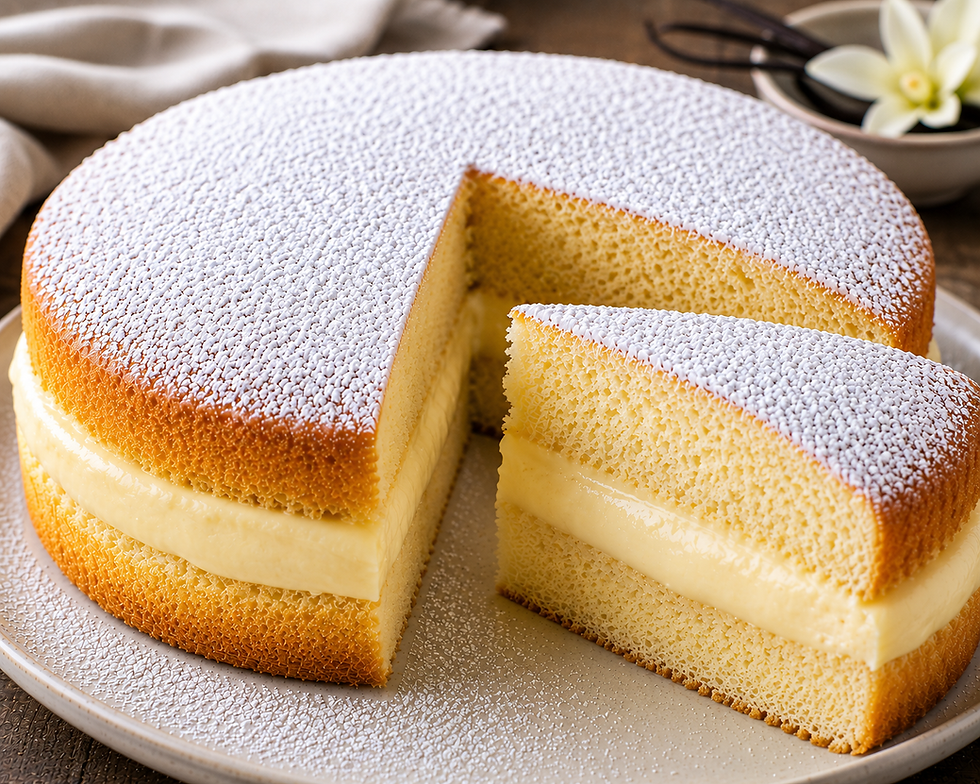
Torta al latte is the plainest cake in the Italian home repertoire and gianduia is the least plain thing Piedmont ever produced. They work together because the cake asks for nothing and the cream supplies everything: a milk crumb with no strong flavour of its own, filled with a hazelnut and chocolate cream that fills every gap in it.
Neither part is difficult. What decides whether the cake is good is the temperature at which it reaches the table.
Yield: one 9 inch (23 cm) cake, 10 servings. Prep: 30 minutes. Bake: 40 minutes. Cool and fill: 2 hours 30 minutes. Total: about 3 hours 40 minutes. Difficulty: intermediate. Course: dolce. Region: Piedmont, Turin and the Langhe.
The Story
Torta al latte is the cake of the dairy country of northern Italy, the flat land of Lombardy, Piedmont and Emilia where milk was the one ingredient a household always had. Cream was sold, butter was sold, eggs were counted, but milk came in every morning and some of it was always left by afternoon. So the cake was built on it: milk carries both the liquid and most of the fat, the butter is a spoonful rather than a block, and the name says nothing more than what is in it. It was a merenda cake, cut in the afternoon and often dipped back into a glass of the same milk it was made with.
Gianduia comes from a different Italy entirely, the city one. When Napoleon closed the continental ports to British shipping in 1806, cacao reaching Turin became scarce and expensive, and the chocolate makers of the city stretched what they had with the one local product that was abundant and rich in fat: the Tonda Gentile hazelnut of the Langhe hills south of the city. The mixture kept the depth of chocolate on a fraction of the cacao. The name arrived later, from Gianduja, the Piedmontese carnival mask who stands for the ordinary Turin countryman, and the wrapped gianduiotto was shown publicly at the Turin carnival of 1865 by the house of Caffarel.
The two met in home kitchens rather than in pastry shops. Once hazelnut and chocolate paste sat in every Piedmontese and Ligurian pantry, the plain milk cake became the thing you split and filled with it, for a birthday or a Sunday. That is the dish here, kept as a filled home cake rather than dressed up as a restaurant dessert, with the one problem of the genre solved: a fat cream and a soft crumb do not stay friends in a refrigerator.
Ingredients
For the milk cake
All purpose flour, 2 cups (250 g)
Granulated sugar, 3/4 cup (150 g)
Whole milk, 1 cup (240 ml)
Large eggs, at room temperature, 3
Unsalted butter, melted, 5 tbsp (70 g)
Baking powder, 2 tsp (8 g)
Fine sea salt, 1/4 tsp (1.5 g)
Vanilla extract, 1 tsp (5 ml)
Finely grated lemon zest, from 1/2 lemon
For the gianduia cream
Whole milk, 1 1/4 cups (300 ml)
Egg yolks, 3
Granulated sugar, 1/3 cup (65 g)
Cornstarch, 2 tbsp (16 g)
Dark chocolate, 60 percent cacao, chopped, 3 1/2 oz (100 g)
Pure hazelnut paste, unsweetened, 2 1/2 oz (70 g)
Unsalted butter, softened, 1 tbsp (14 g)
Fine sea salt, 1 pinch
For lightening the cream, only if the cake will be refrigerated
Cold heavy cream, 1/2 cup (120 ml), or
Cold mascarpone, 3 oz (85 g)
For finishing
Whole milk, 2 tbsp (30 ml), for brushing the cut crumb
Toasted skinned hazelnuts, roughly chopped, 1/3 cup (45 g)
Powdered sugar, for dusting
Preparation
Step 1
Whip the eggs and sugar. Butter a 9 inch (23 cm) springform tin and line the base. Put the eggs, sugar, vanilla, salt and lemon zest in a stand mixer and run it on medium high for 7 to 8 minutes, until the mass has tripled and falls from the whisk in a ribbon that sits on the surface for a couple of seconds. Beyond the baking powder this is the only lift the cake gets, and the softness it is named for comes almost entirely from these eight minutes.
Step 2
Warm the milk and butter together. Melt the butter in a small saucepan, add the milk and bring the mixture to no more than blood heat, around 105°F (40°C). Warm liquid slides into a whipped egg base without collapsing it, where cold milk from the refrigerator would tighten the melted butter into specks and knock the air out. Take the pan off the heat and keep it where you can reach it.
Step 3
Fold the flour in. Sift the flour and baking powder together and add them to the egg base in three additions, folding with a large spatula from the bottom of the bowl upward. Stop while a few streaks are still visible, then pour the warm milk and butter down the side of the bowl and fold just until the batter is even. Every extra turn from here develops gluten and costs you crumb.
Step 4
Bake the cake. Pour the batter into the tin, level the surface and bake at 350°F (175°C) for 38 to 42 minutes on the middle shelf, without opening the oven for the first 30 minutes. It is ready when the top springs back under a fingertip and a skewer in the centre comes out with no wet batter on it. Rest it in the tin for 10 minutes, then turn it onto a rack until completely cold, about 2 hours.
Step 5
Cook the cream base. Whisk the yolks, sugar and cornstarch to a smooth paste. Bring the milk almost to a boil, pour a third of it onto the yolks while whisking, then return everything to the pan. Cook over medium heat, whisking into the corners, until it thickens and then bubbles lazily for a full 60 seconds. That minute of boiling cooks the starch out and stops the cream tasting floury.
Step 6
Finish the cream with chocolate and hazelnut. Off the heat, stir in the chopped chocolate, the hazelnut paste, the butter and the salt while the base is still above 150°F (65°C), so the chocolate melts on residual heat rather than over a flame. Stir until glossy, then press it through a fine mesh sieve into a shallow tray. Lay film directly on the surface and cool to room temperature, about 40 minutes.
Step 7
Split, fill and decide the serving temperature. Level the cake and cut it into two layers with a long serrated knife, then brush both cut faces with the milk. If the cake is going to the table within two hours, spread the cream at room temperature and close it. If it has to be refrigerated, whip the cold heavy cream to soft peaks and fold it into the cooled gianduia cream, or beat in the cold mascarpone instead, then fill and chill. Scatter the hazelnuts over the top in either case and dust just before serving.
Plating
Serve it in wedges on a flat plate, not in a bowl, with the cut face turned toward the diner so the band of cream between two pale layers is the first thing seen. A fork is enough. Nothing else belongs on the plate: a spoonful of whipped cream or a sauce beside it only blurs the line between crumb and filling that the dessert is built on.
Dust the powdered sugar after the cake has come up to serving temperature, never before. Sugar dusted onto a chilled surface dissolves into grey patches as condensation appears, and the top ends up looking wet instead of snowed. Cut with a long thin blade wiped clean between slices, and press the hazelnuts lightly into the top so they stay where you put them.
Professional Technique
The technical problem here is neither the baking nor the cream. It is that a fat cream and a soft crumb harden at completely different rates in the cold. At 39°F (4°C) the cocoa butter in the gianduia cream is set solid, while the crumb stays yielding because its softness comes from air and moisture rather than from crystallised fat. The fork then meets a firm slab in the middle of something tender, and the mouth reads two separate desserts instead of one filled cake. The mistake is purely one of serving temperature.
There is a simple way to judge it before the cake leaves the kitchen. Lay a wedge on a plate and press the exposed band of cream with the back of a teaspoon, at about the pressure you would use to spread butter. If the spoon leaves a clean dent and the cream gives slowly, the filling is at the same yield as the crumb and the cake is ready. If the spoon slides across a firm surface, or the crumb compresses while the cream does not move, give it another 10 or 15 minutes on the counter. Test the wedge you keep for yourself.
That gives two legitimate ways to work. The first is to serve at room temperature, taking the cake out 20 to 30 minutes before cutting, which is enough for a 9 inch cake in a normal kitchen. The second is for the cake that genuinely has to be served cold, and it changes the filling rather than the timing: whipped cream or cold mascarpone folded into the gianduia cream builds in material that stays deformable at refrigerator temperature, so the filling still gives under the fork straight from the cold. Choose one of the two before you fill, not after.
Texture and Moisture Control
The crumb is the fragile part. A cake built on whipped whole eggs and milk holds a great deal of water in a thin walled structure, and that water leaves through the cut faces faster than through the baked crust. The milk brushed onto both halves before filling is not for flavour, it replaces what the knife exposed and keeps the first millimetre of crumb from going papery under the cream. Two tablespoons across a 9 inch cake is the right amount, applied with a pastry brush.
Cold air is drying air, so a cut cake left uncovered in a refrigerator loses moisture at the edges within hours. Keep it under a dome or wrap the cut side against film, and bring the whole cake up to temperature rather than single slices, which dry on three sides at once. When a chilled cake comes out, condensation forms on the cold surface and then evaporates: wait for that before dusting.
The chopped toasted hazelnuts on top are there for contrast rather than decoration. Everything else here is soft, and a scattering of something brittle gives the bite a point of resistance. Add them at the end and never inside the filling, where they soften within an hour of contact with the cream.
Professional Mise en Place
The cake and the cream can both be made the day before, so the only real decision at service is the one about temperature. Set up in this order and nothing waits on anything else.
Equipment and tools
Stand mixer with whisk, or a hand mixer and patience
9 inch (23 cm) springform tin, base lined with parchment
Heavy saucepan and a fine mesh sieve for the cream
Long serrated knife, offset spatula, pastry brush
Instant read thermometer and a shallow tray for cooling the cream
Prepared ahead
Cake baked and cooled whole, wrapped, up to 1 day ahead
Gianduia cream cooked, sieved and cooled under film, up to 2 days ahead
Hazelnuts toasted, skinned and chopped, up to 3 days ahead in a jar
Heavy cream or mascarpone kept cold until the moment of folding
Service setup
Filled cake out of the refrigerator 20 to 30 minutes before cutting
One test wedge set aside for the spoon back check
Powdered sugar in a small sieve, used only after the surface is dry
Knife blade warm and wiped clean between slices
Chef Tips
Buy pure hazelnut paste rather than a sweetened spread. A jar of commercial spread is mostly sugar and vegetable oil, and using it means you cannot control either the sweetness or the set of the cream. Good hazelnut paste from the Langhe is nothing but ground toasted nuts, and it is the single ingredient that decides whether this tastes like gianduia or like a chocolate cake.
Weigh the flour if you can. Two cups scooped from the bag can come out 20 percent heavier than two cups spooned in and levelled, and on a cake this light that difference is the whole character of the crumb.
Never fill a cake that is even slightly warm. Residual heat softens the cocoa butter in the cream, the filling slumps toward the edge under the weight of the top layer, and chilling afterwards does not put it back.
If you need the cake cold and firm for transport, fill it with the mascarpone version and still give it 15 minutes on the table before cutting. Transport is a reason to chill a cake, not a reason to serve one cold.
Common Mistakes
Serving the cake straight from the refrigerator. This is the one real failure of the dessert. The filling is rigid, the crumb is soft, and the two textures never meet. Twenty to thirty minutes on the counter costs nothing and fixes it completely.
Chilling a cake filled with the plain cream. If the cake has to be held cold, the cream needs whipped cream or mascarpone folded through it first. Deciding that after the cake is already assembled is too late to do anything about it.
Adding cold milk to the whipped egg base. Cold liquid seizes the melted butter into small specks and deflates the foam you spent eight minutes building. Bring the milk and butter to around 105°F (40°C) first.
Pulling the cream off the heat as soon as it thickens. The starch needs a full minute of visible bubbling to cook out. Stopped early, the cream tastes faintly floury and thins again as it stands.
Dusting powdered sugar onto a cold cake. The condensation dissolves the sugar into damp grey patches. Wait until the surface has come up to temperature and dried, then dust immediately before serving.
Wine Pairing
Moscato di Scanzo DOCG: The closest match on the list and a rare bottle worth chasing. Dried on the vine and aged for years, it is a sweet red with real tannin behind the fruit, which is what a hazelnut and chocolate filling wants: sweetness level with the cream and tannic grip to cut the cocoa butter. Its dried cherry and almond notes run alongside the toasted hazelnut.
Vin Santo del Chianti Classico DOC: The oxidative choice. Long ageing in small barrels gives it walnut, dried apricot and a faintly bitter nutty finish that meets the toasted hazelnut directly, while the acidity that survives the drying of the grapes keeps the palate from being coated by the fat of the cream. Serve it cool but not cold, around 54°F (12°C), in a small glass.
Recioto della Valpolicella DOCG: Sweet, red and structured, made from the same dried grapes as Amarone but stopped with sugar still in the wine. Its cherry and cocoa character is already close to the filling, and tannin and alcohol together give it the weight to stand up to chocolate at 60 percent cacao rather than becoming two sweet things side by side.
Marsala DOC: The fortified option, and the most forgiving with a milk based cake. A Superiore Dolce brings caramel, dried fig and a salted nut finish, and the higher alcohol carries flavour across the fat in a way an unfortified wine cannot. Its gentle salinity also picks up the pinch of salt in the cream, which is the detail that keeps the whole slice from reading as flatly sweet.
Storage & Reheating
The filled cake keeps refrigerated under a dome or loosely wrapped for up to 3 days and is at its best on the first two. Bring it out 20 to 30 minutes before every service, not only the first one, because the filling resets hard each time it goes back into the cold. Do not leave it at room temperature overnight: the cream contains milk, yolks and butter and belongs in the refrigerator between servings.
Unfilled, the cake freezes well. Wrap the cold layers tightly and freeze for up to 2 months, then thaw still wrapped at room temperature for about 3 hours before filling. The cream does not freeze, since the starch releases water on thawing. Made ahead it keeps 2 days refrigerated under film and needs a short beating by hand to come back smooth. Nothing here is reheated: brush a dried cut face with a little milk and leave the slice out for 20 minutes instead.
Nutrition
Per serving, based on 10 slices of the cake filled with the plain gianduia cream:
Calories: 415 kcal
Total Fat: 20 g
Saturated Fat: 9 g
Trans Fat: 0 g
Unsaturated Fat: 10 g
Cholesterol: 135 mg
Sodium: 170 mg
Total Carbohydrates: 50 g
Fiber: 2 g
Total Sugars: 30 g
Added Sugars: 25 g
Protein: 9 g
Lactose: 3 g
Principal micronutrients: calcium, vitamin E, magnesium, iron, riboflavin, phosphorus
These figures are estimates. Folding whipped cream or mascarpone into the filling adds roughly 60 to 80 calories and 7 g of fat per slice.


Comments