
Italian Extra Soft Milk Cake with Chestnut Cream | Torta al Latte con Crema di Castagne

Torta al latte is the plainest cake in the Italian home repertoire and one of the hardest to serve at its best. There is no butter in it and very little fat of any kind, which is why it stales within a day and why putting something inside it changes everything about the way it eats.
Fill that crumb with chestnut cream and you get a dessert that is still changing six hours later, and changing for the better. This recipe is about that window, and about deciding when to cut.
Yield: 8 servings, one 9 in (23 cm) cake. Prep: 35 minutes. Bake: 40 minutes. Cool and chill: 2 hours. Fill and rest: 1 to 6 hours. Total: about 4 hours 15 minutes. Difficulty: intermediate. Course: dolce. Region: Piedmont and the chestnut Apennines.
The Story
Torta al latte belongs to the part of Italian baking that grew out of kitchens with no money for butter. Milk was in the house every morning, butter was something a family sold rather than ate, and a sponge raised on beaten eggs and slackened with warm milk was the cake that could be made on a Sunday without touching the household budget. Versions survive across the north and the centre under local names, many barely written down, and all share a very light crumb carrying almost no richness of its own. That is a weakness alone and a strength the moment something goes inside it: the cake tastes of milk, vanilla and lemon, so whatever fills it becomes the flavour of the dessert.
Chestnut cream comes from the other half of the same mountain economy. For centuries the chestnut was called the bread tree in the Italian uplands, and whole communities in the Mugello, the Garfagnana, the hills above Montella in Campania and the valleys behind Cuneo lived through the winter on it, boiled whole or dried and ground into flour. Marrone del Mugello and Castagna di Montella now carry protected status, and the Marrone di Cuneo is the variety on which Piedmont built its candied chestnut trade from the second half of the eighteen hundreds. Sweetened chestnut puree was the offcut of that trade: the broken marrons that could never be candied whole were cooked down with sugar and vanilla instead, and the cream a confectioner made rather than waste them has outlived the fashion for the whole candied fruit.
Putting the two together was less an invention than an inevitability wherever both existed. In the chestnut valleys the milk and the marrons came from the same few kilometres, and a filled milk cake was what a household made in November, once the chestnuts had been cooked down in October and there was a reason to celebrate. What is modern is only the precision. The old version was eaten whenever somebody cut it. Knowing what happens to that cake between the filling and the plate is what turns a good home cake into a dessert you can time.
Ingredients
For the milk cake
All purpose flour, sifted, 1 1/2 cups (190 g)
Potato starch, sifted, 1/3 cup (50 g)
Granulated sugar, 3/4 cup (150 g)
Eggs, separated, at room temperature, 4 large
Whole milk, warmed to 100°F (38°C), 2/3 cup (160 ml)
Mild olive oil or sunflower oil, 1/3 cup (80 ml)
Baking powder, 2 tsp (8 g)
Vanilla bean, split and scraped, 1, or vanilla extract, 1 1/2 tsp (7 ml)
Finely grated lemon zest, from 1 unwaxed lemon
Fine sea salt, 1/4 tsp (1.5 g)
For the chestnut cream filling
Sweetened chestnut puree, crema di marroni, 10 oz (285 g)
Heavy cream, very cold, 1 cup (240 ml)
Mascarpone, cold, 3 1/2 oz (100 g)
Dark rum, 1 tbsp (15 ml)
Confectioners sugar, 1 tbsp (8 g), only if the puree is lightly sweetened
Fine sea salt, 1 small pinch
For finishing
Whole milk, for brushing the cut faces, 3 tbsp (45 ml)
Confectioners sugar, for dusting, 1 tbsp (8 g)
Candied chestnuts, marrons glaces, broken into pieces, 2 oz (55 g)
Shaved dark chocolate, 70 percent, 1 tbsp, optional
Preparation
Line the pan and set the oven
Heat the oven to 335°F (170°C), rack in the lower third. Butter a 9 in (23 cm) round pan with removable sides, line the base with parchment and butter the paper, but leave the sides bare above it so the batter can grip and climb. Sift the flour, potato starch, baking powder and salt together twice, and have the milk warm and the oil measured before you beat anything.
Beat the yolks to the ribbon stage
Whip the yolks, two thirds of the sugar, the lemon zest and the vanilla seeds on medium high for a full 6 to 8 minutes. You want the classic ribbon: pale, tripled in volume, thick enough that a line drawn across the surface holds a second before sinking. Do not shorten it: almost all the lift comes from air beaten into eggs, and the baking powder is only insurance.
Slacken the base with warm milk and oil
With the mixer on low, pour in the oil in a thin steady stream, then the warm milk. The batter will look alarmingly loose and that is correct. At around 100°F (38°C) the milk thins the yolk foam enough for the flour to hydrate in a few strokes instead of twenty, and fewer strokes means a softer crumb. Fold the dry ingredients in by hand in three additions, stopping the moment no dry flour shows.
Whip the whites and fold them in two additions
Whip the whites with the salt to soft peaks, rain in the remaining sugar and take them to a firm but glossy meringue that bends at the tip. Fold a generous quarter into the batter with no care at all, purely to loosen it, then fold the rest through in one addition, cutting down through the centre and turning the bowl a quarter turn each time. Forty confident folds beat a hundred timid ones.
Bake at 335°F (170°C) and judge the edge
Pour into the pan, level the surface with one pass of an offset spatula and put it straight in. Bake 38 to 42 minutes without opening the door for the first 30. It is ready when the surface springs back under a fingertip, the edges have begun to pull away from the bare sides, and a skewer comes out with a few moist crumbs rather than clean. A dry skewer means you are three minutes past soft.
Cool, chill and split the cake
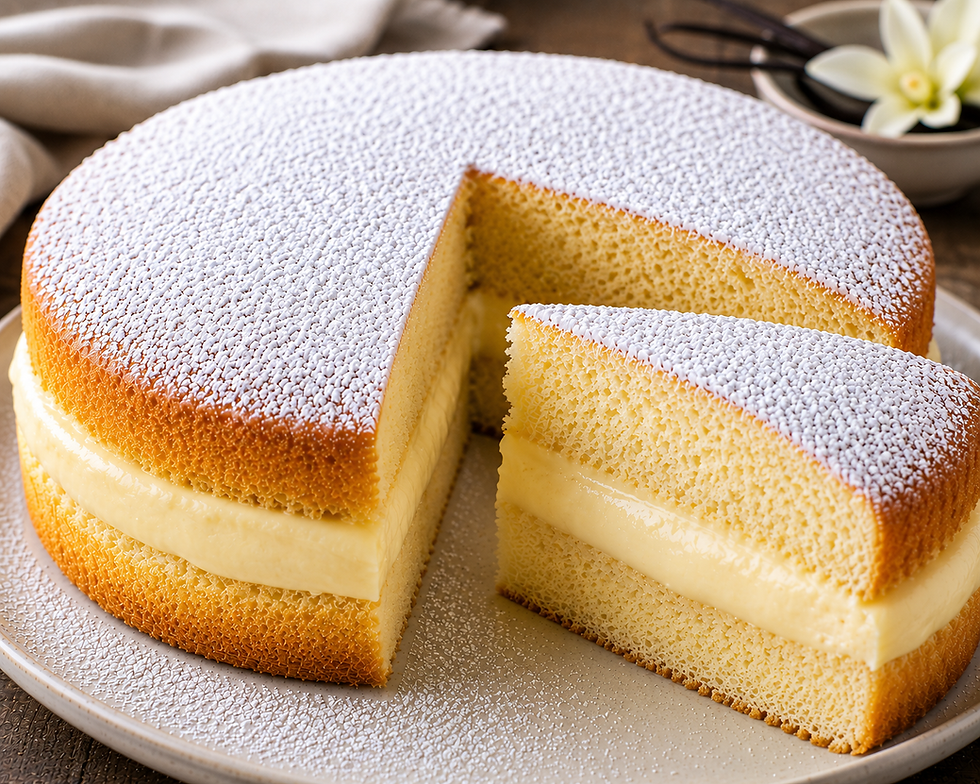
Cool in the pan 10 minutes, release the sides and turn the cake onto a rack for an hour, then refrigerate it uncovered for another hour. A cold crumb cuts cleanly and a warm one tears. Level the dome with a serrated knife if it is pronounced, then split the cake in two with a long thin blade, turning it against the knife rather than sawing forward.
Whip the chestnut cream, fill, and start the clock
Loosen the chestnut puree with the rum and the mascarpone until smooth. Whip the cold cream separately to soft peaks only, then fold it into the chestnut base in three additions. Brush both cut faces with the milk, spread all the filling on the lower layer in one confident pass to within 1/4 in (6 mm) of the edge, and set the top layer on. Note the time. From here the cake works on itself.
Plating
Dust the top with confectioners sugar through a fine sieve in the last minute before it goes to the table, because on a chilled cake the sugar draws moisture and turns transparent within ten minutes. Scatter the candied chestnuts slightly off centre rather than across the whole surface, and put the shaved chocolate beside them, not on top.
Cut with a thin blade warmed under hot water and wiped dry between slices. Serve at around 61°F (16°C): 20 minutes out of the refrigerator on a warm day, 40 on a cold one. Straight from the cold the chestnut is muted and the crumb tastes tight. Stand each slice upright on a cool plate so the two layers read separately, and add nothing else. A cream this sweet needs no sauce beside it.
Professional Technique
The technique that matters here happens after the work is finished. In the hours following the filling, water moves. The cream holds more available water than the baked crumb, the crumb is dry and porous and pulls it in, and neither side can stop it. So a filled cake is never the same dessert twice. Cut it fifteen minutes after assembly and the cream is full and loose against a crumb still dry and crumbly at the join. Cut the same cake after six hours and the picture has reversed: the crumb either side of the filling is damp, dense and faintly translucent, sliceable in one clean movement, and the cream has firmed because it gave away part of what made it soft.
Neither cake is wrong. They are two points on one curve, and the only mistake is arriving at either by accident. Somewhere around four to six hours the two sides reach a balance and the cake sits still: the crumb has taken what it can, the cream has given what it can, and the slice holds together with both intact. That is the point to aim at when the cake is made in advance.
A chestnut cream suits a crumb this thirsty because it has very little water to give away in the first place. Sweetened chestnut puree is a dense, heavily sugared solid, and the sugar in it holds water tightly rather than leaving it free to travel. Against a pastry cream or a plain whipped cream, mostly water held loosely, the transfer is fast and the cake is soggy in three hours and tired in eight. Here the movement is slow and partial, which is why this filling gives the cake two full days rather than one evening.
Texture and Moisture Control
Practically, this means you decide the quantity of filling by when you intend to serve. A cake going to the table within the hour should be filled generously, because the crumb will not have had time to take anything and the cream has to carry the whole slice on its own. A cake filled the night before wants a slightly thinner and slightly firmer layer, since a third of its softness will end up in the crumb by morning and a layer that was perfect at midnight reads as thin and dry at noon.
Temperature governs the speed. In the refrigerator at 39°F (4°C) the exchange is slow and the cake takes most of a night to settle. On a kitchen counter at 72°F (22°C) the same thing happens in two hours, along with everything else that happens to whipped dairy at that temperature, which is why the resting always belongs in the cold. Brushing the cut faces with plain milk rather than a syrup is part of the same control: it seals the surface and takes the initial thirst off the crumb without adding the free water that a sugar syrup pushes straight into it.
Professional Mise en Place
In a working kitchen the cake and the cream are made on different days, and the assembly is timed backwards from service.
Equipment and tools
Stand mixer with whisk, plus a second clean bowl for the whites
9 in (23 cm) round pan with removable sides, parchment, offset spatula
Long serrated knife for levelling, long thin blade for splitting
Fine sieve, pastry brush, digital thermometer for the milk
Prepared ahead
Cake baked, cooled and wrapped whole, up to 2 days ahead at cool room temperature
Cake layers split and refrigerated on a tray, up to 1 day ahead
Chestnut base with rum and mascarpone, up to 2 days ahead, refrigerated
Candied chestnuts broken and held dry in a sealed container
Service setup
Cream whipped and folded in no more than 30 minutes before filling
Cake filled 4 to 6 hours before service for a settled slice, 15 minutes for a loose one
Filled cake refrigerated uncovered on a tray, never wrapped against the cream
Out of the refrigerator 20 to 40 minutes before cutting, dusted last
Chef Tips
Read the label before you buy the puree. Italian crema di marroni is already sweetened and usually vanilla flavoured, French creme de marrons sweeter still, and unsweetened chestnut puree is a different product that makes a savoury filling. Taste it and add sugar only if it needs it.
Weigh the flour and the starch. The potato starch is a quarter of the dry weight and it is why the crumb is tender rather than chewy, so a scoop heavy on flour and light on starch gives a tougher cake that looks identical going into the oven.
If the cake has to travel, fill it thinly and carry the rest of the cream in a piping bag to add on the plate. A generously filled milk cake will not survive being moved after two hours in the cold, when the layers slide.
Save a spoonful of the finished cream and refrigerate it overnight. Tasting it beside the cake the next day tells you how much softness went into the crumb, and after two cakes you will know how thick to spread.
Common Mistakes
Filling the cake while it is still warm. A warm crumb takes water several times faster than a cold one, and the whipped cream loses structure at the same time. You get a wet join and a slumped layer within an hour.
Cutting it at whatever hour is convenient. The slice at twenty minutes and the slice at six hours are two different desserts, both good, but only if you chose. Decide when you are serving, then fill accordingly.
Brushing the layers with sugar syrup. Syrup is mostly free water and goes straight into a crumb this porous, flattening the cake and diluting the chestnut. Plain milk seals the cut face and adds far less.
Overwhipping the heavy cream. Soft peaks only. The puree is stiff, and folding it into cream that is already firm leaves either lumps of puree or a grainy, buttery texture from the extra working.
Wrapping the filled cake in plastic. Film pressed against the cream traps the water it gives up and makes the surface weep. Refrigerate it uncovered on a tray, or under a dome that does not touch it.
Wine Pairing
Moscato d'Asti DOCG: The bottle from the same Piedmontese hills as the marrons, and the safest choice of the four. At around 5 to 6 percent alcohol and with a light natural sparkle it carries less sugar than any passito on this list, so it refreshes a plain cake instead of burying it. The carbon dioxide and the grape acidity together lift the fat of the mascarpone off the palate between mouthfuls.
Vin Santo del Chianti Classico DOC: Grapes dried on racks, then years in small caratelli with air in the barrel, which builds walnut, dried fig and brown sugar aromas that run straight into the cooked chestnut rather than contrasting with it. Real acidity sits behind the sweetness and stops the pairing turning heavy. Serve it cool, around 54°F (12°C), in a small glass.
Recioto di Soave DOCG: Garganega left to dry into the winter, giving dried apricot, candied peel and the bitter almond finish the grape always keeps. That bitterness is the useful part: it cuts across the sweetness of the chestnut puree so the last third of the slice tastes as interesting as the first. It has more weight than the Moscato and suits a generously filled cake.
Ramandolo DOCG: Verduzzo Friulano from steep terraces above Nimis, and unusual among sweet whites for carrying genuine tannin from its thick skins. That tannin grips the cream fat and scrubs the palate clean in a way no soft dessert wine manages, while the honey and quince aromatics sit alongside the chestnut instead of competing with it.
Storage & Reheating
The filled cake keeps refrigerated for 2 days, uncovered on a tray or under a dome that does not touch it, and the second day is genuinely good rather than merely acceptable, because the chestnut cream releases its water so slowly. By day three the crumb has taken everything it can and the slice tastes flat. The unfilled cake, wrapped in parchment and then foil, keeps 2 days at cool room temperature and should never sit bare in the refrigerator, where it dries faster than on the counter.
Freeze the baked layers rather than the finished cake: wrapped tightly they hold 1 month and thaw overnight in the refrigerator with no loss. Never freeze it filled, since the cream separates on thawing and floods the crumb. There is no reheating here, only 20 to 40 minutes on the counter to reach 61°F (16°C).
Nutrition
Per serving, based on 8 slices:
Calories: 480 kcal
Total Fat: 25 g
Saturated Fat: 12 g
Trans Fat: 0 g
Unsaturated Fat: 12 g
Cholesterol: 140 mg
Sodium: 180 mg
Total Carbohydrates: 55 g
Fiber: 2 g
Total Sugars: 33 g
Added Sugars: 26 g
Protein: 8 g
Lactose: 2.6 g
Principal micronutrients: calcium, potassium, vitamin B2, vitamin A, phosphorus, manganese
These figures are estimates and depend above all on how heavily sweetened the chestnut puree is, which varies widely between brands.



Comments