
Torta 7 Vasetti (Italian Seven Jar Yogurt Cake)
- 10 hours ago
- 9 min read

Prep time: 20 minutes
Baking time: 40 to 50 minutes
Cooling time: 40 minutes
Total time: About 1 hour 50 minutes
Servings: 10 to 12
Difficulty: Easy
Oven: 350°F, 175°C
Pan: 9 inch, 23 cm round cake pan
Measuring jar: 1 standard 125 g yogurt container
Torta 7 Vasetti is one of the simplest and most recognizable cakes of modern Italian home baking.
Its defining characteristic is already contained in its name. Instead of weighing most of the ingredients individually, the empty yogurt container becomes the measuring cup for the rest of the recipe.
The classic formula is beautifully simple: one jar of yogurt, two jars of sugar, three jars of flour, and one jar of oil.
That gives us the famous seven jars.
It is the kind of cake that became popular in Italian family kitchens because it requires very little equipment and is exceptionally easy to remember.
But simple does not mean careless.
The difference between an ordinary yogurt cake and an excellent one comes from properly aerating the eggs, incorporating the oil gradually, controlling the flour, and baking only until the crumb has set.
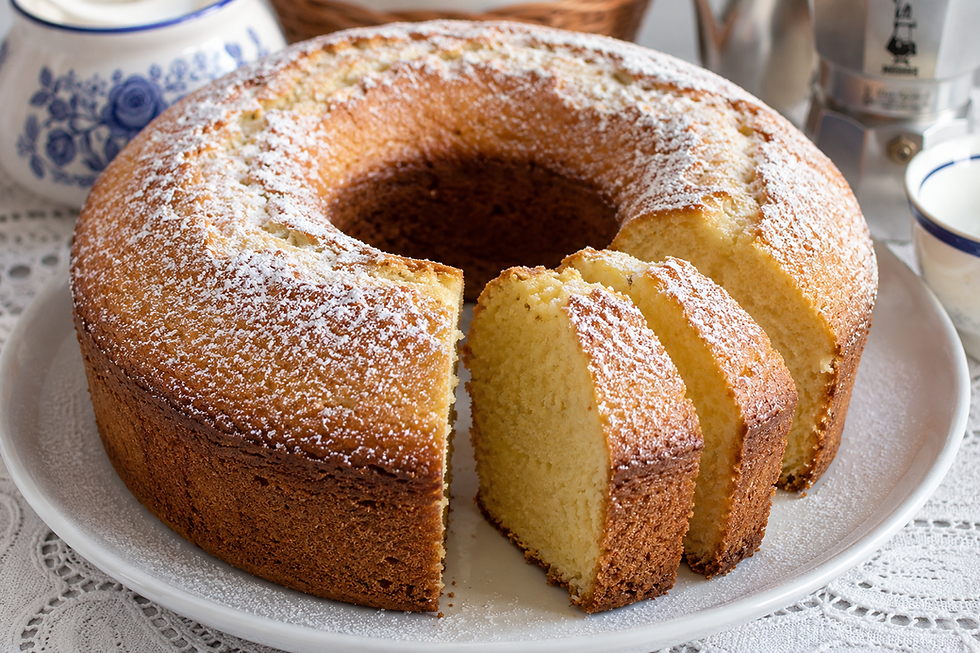
The finished cake should be tall, extremely soft, lightly moist, and delicately scented with lemon and vanilla.
The Seven Jar Formula
The traditional structure is:
1 jar yogurt
2 jars sugar
3 jars flour
1 jar oil
Total: 7 jars
The yogurt container is washed, dried, and used as the measuring unit.
For consistency, this recipe assumes a standard 125 g yogurt container.
I am also giving you approximate weights so the recipe can be reproduced accurately even without the original container.
Ingredients
For the Cake
1 jar plain whole milk yogurt, 125 g
2 jars granulated sugar, approximately 200 g
3 jars all purpose flour, approximately 240 g
1 jar neutral vegetable oil, approximately 110 ml
3 large eggs, room temperature
16 g baking powder
Finely grated zest of 1 untreated lemon
1 teaspoon pure vanilla extract
1 small pinch fine sea salt
For the Pan
Unsalted butter, as needed
Flour, as needed
For Finishing
Powdered sugar, as needed
Choosing the Yogurt
Use plain whole milk yogurt for the most traditional result.
Avoid very thin yogurt.
A creamy whole milk yogurt gives the cake moisture and tenderness without making the batter excessively loose.
Do not use sweetened flavored yogurt unless you intentionally want to modify the recipe.
The classic version should have a clean dairy flavor with lemon and vanilla in the background.
Choosing the Oil
Use a neutral tasting oil.
Sunflower oil is particularly suitable.
A mild vegetable oil also works.
Avoid strongly flavored oils because they can dominate the delicate yogurt and lemon aroma.
The use of oil rather than butter is one reason this cake remains remarkably soft even after it has completely cooled.
Mise en Place
Preheat the oven to 350°F, 175°C.
Position the rack in the center.
Butter a 9 inch, 23 cm round cake pan.
Line the bottom with parchment paper if desired.
Dust the sides lightly with flour and remove the excess.
Remove the eggs and yogurt from the refrigerator approximately 30 minutes before beginning.
Room temperature ingredients combine more evenly.
Empty the yogurt into a small bowl.
Wash the yogurt container thoroughly.
Dry it completely.
The container now becomes your measuring cup.
Measure the sugar, flour, and oil before beginning.
Sift the flour together with the baking powder and salt.
Finely grate the lemon zest.
Now you are ready to prepare the batter.
Step 1: Prepare the Lemon Sugar
Place the two jars of granulated sugar into a large mixing bowl.
Add the finely grated lemon zest.
Rub the zest into the sugar with your fingertips for approximately 60 seconds.
The sugar should begin to feel slightly moist.
More importantly, you should immediately smell the essential oils released from the lemon skin.
This small step produces considerably more lemon aroma than simply throwing the zest into the finished batter.
Do not grate the white pith underneath the yellow skin.
It can introduce bitterness.
Step 2: Add the Eggs
Add the three room temperature eggs to the lemon sugar.
Begin mixing at medium speed.
Once the eggs and sugar are combined, increase to medium high speed.
Beat for approximately 5 to 7 minutes.
This is one of the most important stages of the entire recipe.
What the Egg Mixture Should Look Like
At the beginning, the mixture will be yellow and relatively liquid.
As you continue whipping, it should become:
Paler
Thicker
Foamy
Significantly increased in volume
When you lift the beaters, the mixture should fall back into the bowl in a ribbon that remains visible on the surface for several seconds before disappearing.
If the mixture is still thin and immediately disappears into itself, continue whipping.
This incorporated air contributes significantly to the cake's light texture.
Step 3: Add the Yogurt
Reduce the mixer to low speed.
Add the entire jar of yogurt.
Mix for approximately 20 to 30 seconds.
Stop as soon as the yogurt is evenly incorporated.
Do not continue beating aggressively because you do not want to unnecessarily destroy the air incorporated into the eggs.
Add the vanilla extract.
Mix briefly.
Step 4: Incorporate the Oil Slowly
Keep the mixer on low speed.
Pour the oil into the batter in a thin, steady stream.
Do not pour the entire quantity in at once.
Take approximately 30 to 45 seconds to incorporate it.
The objective is to create a stable emulsion between the eggs, yogurt, and oil.
Once all the oil has been added, mix for another 10 seconds.
Then stop.
What You Should See
The batter should remain smooth and slightly aerated.
There should not be a visible layer of oil floating on the surface.
If oil is visible around the edges, continue mixing very briefly at low speed until incorporated.
Do not increase to high speed.
Step 5: Prepare the Dry Ingredients
The flour, baking powder, and salt should already have been sifted together.
Sifting is particularly useful in this recipe because the batter is relatively delicate.
Large lumps of flour are difficult to remove later without overmixing.
Divide the dry ingredients visually into approximately three portions.
Step 6: Add the First Portion of Flour
Add approximately one third of the dry ingredients.
Set the mixer to its lowest speed.
Mix for approximately 10 seconds.
Stop while a few small traces of flour are still visible.
Do not wait until the batter looks completely perfect.
The remaining folding will finish the job.
Step 7: Add the Remaining Flour
Add another third of the dry ingredients.
Mix again for approximately 10 seconds.
Add the final third.
Mix only until most of the flour has disappeared.
Then stop the machine.
From this point forward, finish the batter by hand.
Step 8: Finish the Batter by Hand
Take a flexible spatula.
Scrape around the sides of the bowl.
Then run the spatula firmly across the bottom.
Flour sometimes accumulates underneath the lighter batter and remains invisible from the surface.
Fold the batter from bottom to top approximately 6 to 8 times.
Rotate the bowl slightly after each fold.
Stop as soon as the batter becomes homogeneous.
Correct Batter Consistency
The finished batter should be:
Smooth
Pale yellow
Lightly glossy
Moderately thick
Aerated
Pourable but not watery
Lift some batter with the spatula.
It should fall back into the bowl in a broad ribbon.
The ribbon should remain visible for a moment before slowly merging with the surface.
If the batter runs like milk, something has been measured incorrectly.
If it is extremely stiff, there may be too much flour.
Step 9: Transfer the Batter to the Pan
Pour the batter into the prepared cake pan.
Use the spatula to scrape the bowl completely.
Level the surface very gently.
Do not aggressively spread or press the batter.
Lift the pan approximately 1 inch, 2 to 3 cm from the counter.
Tap it down once.
This helps eliminate unusually large air pockets.
Do not repeatedly bang the pan against the counter because you would remove the aeration created earlier.
Step 10: Bake
Immediately transfer the cake to the preheated oven.
Place it on the center rack.
Bake at 350°F, 175°C for approximately 40 to 50 minutes.
Do not open the oven during the first 30 to 35 minutes.
During this stage, the trapped air expands, the baking powder produces additional gas, and the egg and flour structure gradually sets.
Opening the oven too early can cause the center to sink.
Step 11: Observe the Rise
At approximately 35 minutes, look through the oven door.
The cake should have risen noticeably.
The surface should be gently domed.
The color should be pale golden rather than dark brown.
You may see a natural crack across part of the surface.
That is completely acceptable in a homemade Torta 7 Vasetti.
Step 12: Test for Doneness
At approximately 40 minutes, open the oven carefully.
Insert a wooden skewer into the center.
The cake is ready when the skewer emerges with a few small moist crumbs but no raw batter.
Gently press the center with one fingertip.
It should spring back.
If your finger leaves a deep indentation and the center feels unstable, continue baking.
Check again after approximately 5 minutes.
If using an instant read thermometer, the center should be approximately 200 to 205°F, 93 to 96°C.
Step 13: Protect the Surface if Necessary
If the surface becomes sufficiently golden before the interior is completely cooked, loosely cover the cake with aluminum foil.
Continue baking until the center is properly set.
Do not lower the oven temperature dramatically during baking.
Maintain a stable environment and simply protect the surface.
Step 14: Remove from the Oven
When properly baked, remove the cake from the oven.
Place the entire pan on a cooling rack.
Do not immediately remove the cake.
Allow it to rest inside the pan for approximately 15 minutes.
The crumb is still fragile immediately after baking.
Steam is redistributing through the interior and the structure is continuing to stabilize.
Step 15: Unmold
After 15 minutes, run a thin knife carefully around the perimeter if necessary.
Release the cake from the pan.
Transfer it to a cooling rack.
Allow it to cool completely for approximately 30 to 40 minutes before cutting.
Do not judge the final crumb while the cake is extremely hot.
The Correct Texture
A properly prepared Torta 7 Vasetti should be noticeably tall.
The crumb should be fine and evenly aerated.
When pressed gently, the cake should compress and then spring back.
It should feel moist without appearing wet.
There should not be large tunnels running through the interior.
Large irregular holes usually indicate excessive mixing, too much leavening, or an unstable batter.
The flavor should be delicate.
You should taste yogurt, eggs, lemon, vanilla, and a gentle sweetness.
No single ingredient should dominate.
Why Yogurt Makes the Cake Soft
Yogurt contributes moisture, fat, milk proteins, and acidity.
The acidity interacts with the leavening system and also influences gluten development.
The result is a tender crumb that remains soft longer than many traditional butter cakes.
Oil contributes further softness because it remains liquid at room temperature.
Butter becomes firm as it cools.
Oil does not.
This is one reason Torta 7 Vasetti can remain pleasantly tender the following day.
Common Mistakes
Not Whipping the Eggs Enough
Five to seven minutes may seem excessive, but proper aeration makes a significant difference.
Look for the ribbon stage.
Pouring the Oil Too Quickly
Introduce it gradually so the mixture remains emulsified.
Using Cold Ingredients
Cold yogurt and eggs can make incorporation less stable.
Allow them to approach room temperature.
Adding All the Flour at Once
Gradual incorporation makes it easier to avoid lumps and excessive mixing.
Overmixing the Flour
Once flour enters the batter, gluten begins developing.
Mix only as much as necessary.
Opening the Oven Too Early
Wait at least 30 to 35 minutes.
Overbaking
The cake should remain soft.
Do not wait for the crumb to become completely dry.
Finishing
Once completely cooled, transfer the cake to a serving plate.
Dust lightly with powdered sugar.
Keep the decoration simple.
A traditional Torta 7 Vasetti does not require frosting, glaze, buttercream, or elaborate toppings.
Its beauty is its simplicity.
How to Serve
Serve at room temperature.
For breakfast, accompany a slice with cappuccino, espresso, or warm milk.
For an afternoon snack, serve with coffee or tea.
It is also excellent for children because of its mild flavor and very soft texture.
Variations
Once you understand the base technique, the recipe can be adapted.
Fresh orange zest can replace lemon.
Small pieces of apple can be folded into the batter.
Chocolate chips can be added.
A small portion of flour can be replaced with cocoa powder for a chocolate version.
However, the plain yogurt, lemon, and vanilla version remains the best starting point because it demonstrates the characteristic texture of the cake.
Storage
Store the completely cooled cake covered at room temperature.
It remains good for approximately 3 days.
Do not refrigerate it unnecessarily because refrigeration can make the crumb feel firmer.
If your kitchen is extremely warm, refrigeration is acceptable, but bring the cake back to room temperature before serving.
Individual slices can also be frozen.
Wrap them carefully and freeze.
Allow them to thaw naturally at room temperature.
Approximate Nutrition
Per serving, based on 12 servings:
Calories: approximately 270 kcal
Protein: approximately 5 g
Carbohydrates: approximately 38 g
Fat: approximately 11 g
Sugar: approximately 18 g
Fiber: approximately 1 g
Chef Gianluca’s Notes
Despite its reputation as an extremely easy cake, there are three technical details worth respecting.
First, whip the eggs and sugar properly. Do not simply mix them together.
Second, incorporate the oil slowly. A stable emulsion creates a finer texture.
Third, once the flour enters the bowl, stop treating the batter aggressively.
You spent several minutes incorporating air into the eggs. There is no reason to destroy that structure at the end.
The famous seven jar formula makes the recipe easy to remember, but technique is what makes the cake exceptional.
Chef Gianluca’s Recommendation
For your first version, resist the temptation to add fruit, chocolate chips, cream, or additional flavors.
Make the classic cake first.
Use good whole milk yogurt, fresh lemon zest, vanilla, and a neutral oil.
Whip the eggs until they reach a true ribbon stage, incorporate the remaining ingredients gently, and remove the cake from the oven as soon as the center is properly set.
The result should be tall, incredibly soft, fragrant, and uncomplicated.
That simplicity is exactly why Torta 7 Vasetti became such a beloved cake in Italian home kitchens.
Chef Gianluca Deiana




Comments