
Italian Nutella Filled Milk Cake | Torta al Latte Ripiena di Nutella

A torta al latte is the plainest cake in the Italian repertoire: whole eggs, sugar, flour, butter and a generous quantity of milk, baked in one tin and eaten for days. Split it once and fill it with hazelnut cream and it becomes the cake Italian children remember. Nothing about it is difficult. The one detail that separates a good one from a sad one is the sugar on top.
Yield: 10 servings, one 9 inch (23 cm) cake. Prep: 25 minutes. Bake: 35 minutes. Cool: 2 hours. Total: about 3 hours. Difficulty: easy. Course: dessert and breakfast cake.
The Story
The torta al latte belongs to a family of Italian cakes that has no famous pastry chef attached to it and never needed one. These are the torte da colazione, the cakes of the kitchen cupboard, baked on a Saturday in the dairy country of the Po valley and across the Apennine foothills where milk was the one ingredient nobody had to buy. The recipe is built around that abundance. Milk replaces most of the fat, so the batter is thin and pours rather than spoons, and the baked crumb stays tender for three or four days without any syrup or soaking. In houses where cake had to last the week, that was the whole point.
The hazelnut side of the cake comes from somewhere much more specific. The Langhe hills of Piedmont grow the Tonda Gentile, the round hazelnut that carries the Nocciola Piemonte IGP, and Turin confectioners had been stretching scarce cocoa with hazelnut paste since the middle of the nineteenth century. The gianduiotto, moulded in Turin from 1865, was born out of exactly that arithmetic. After the Second World War cocoa was rationed and ruinously expensive, and in 1946 a pastry maker in Alba called Pietro Ferrero pressed hazelnuts, sugar and a little cocoa into a solid loaf that could be sliced onto bread. It was sold as Giandujot, became a spreadable Supercrema in 1951, and reached its present form in 1964.
What happened next was domestic rather than commercial. Italian families already had a plain milk cake and now had a jar of hazelnut cream in the cupboard, and the two met at merenda, the afternoon snack. Splitting the cake and filling it was not a recipe anybody published. It was what you did with what was there, and it is still the most common birthday cake in a great many Italian kitchens, made in the morning and finished the same afternoon.
Ingredients
For the milk cake
Whole milk, 1 1/4 cups (300 ml)
Unsalted butter, 5 tbsp (70 g)
Large eggs, at room temperature, 3
Granulated sugar, 3/4 cup (150 g)
All purpose flour, 1 3/4 cups (215 g)
Baking powder, 2 tsp (8 g)
Fine sea salt, 1/4 tsp (1.5 g)
Vanilla extract, 1 tsp (5 ml)
Finely grated lemon zest, from 1 lemon
For the hazelnut filling
Hazelnut and cocoa spread, 10 oz (280 g)
Heavy cream, 2 tbsp (30 ml)
Fine sea salt, 1 small pinch
For finishing
Snow sugar or plain confectioners sugar, 2 tbsp (16 g)
Toasted hazelnuts, roughly crushed, 2 tbsp (18 g)
For the tin
Softened butter, 1 tbsp (14 g)
All purpose flour, 1 tbsp (8 g), or a round of parchment
Preparation
Step 1
Prepare the tin and the oven. Heat the oven to 350°F (175°C) with a rack in the lower middle position. Butter a 9 inch (23 cm) round tin, line the base with a disc of parchment and dust the sides with flour. A milk cake batter is thin and climbs the sides as it sets, so the sides need the flour to grip and the base needs the paper to release.
Step 2
Warm the milk and butter. Put the milk and the butter in a small saucepan and set it over low heat until the butter has melted and the milk is hot to the finger but nowhere near simmering, around 140°F (60°C). Take it off the heat and leave it. You want it warm when it goes into the batter, not boiling, and not cold.
Step 3
Whip the eggs and sugar. Beat the eggs, sugar, salt, vanilla and lemon zest on high speed for a full 5 minutes, until the mixture has tripled in volume, turned pale ivory, and falls from the beater in a thick ribbon that sits on the surface for a second or two before sinking. This is the only aeration the cake gets beyond the baking powder, so do not cut the time short.
Step 4
Fold in the dry ingredients. Sift the flour and baking powder together over the egg foam in three additions, folding with a large spatula from the bottom of the bowl upward and turning the bowl a quarter turn between strokes. Stop the moment no dry flour is visible. Beating at this stage builds gluten and you will taste it later as a tight rubbery crumb.
Step 5
Add the warm milk. Pour the warm milk and butter down the side of the bowl in a slow steady stream, folding as you go, until the batter is smooth and distinctly fluid. It will look alarmingly thin. That is correct for this cake. Pour it into the prepared tin and rap the tin once on the counter to release the largest bubbles.
Step 6
Bake. Bake for 33 to 38 minutes, without opening the door for the first 25. The cake is ready when the top is deep gold, the centre springs back under a fingertip instead of holding the dent, and a skewer comes out with nothing but a trace of moisture on it. A milk cake pulled two minutes early sinks in the middle as it cools.
Step 7
Cool and split. Leave the cake in its tin on a wire rack for 15 minutes, then turn it out and cool it completely on the rack, right side up, for at least 90 minutes. Set a ruler against the side, mark the halfway line with a series of shallow cuts all the way around, then work a long serrated knife through in a sawing motion, following your own marks.
Step 8
Fill the cake. Stir the hazelnut spread with the cream and the pinch of salt until it loosens into a soft glossy paste. Spread it over the lower layer with a small offset spatula, right out to about a quarter inch (5 mm) from the edge, and lay the top layer back on. Press very lightly with your open palm, no more, and leave it 20 minutes before dusting.
Plating
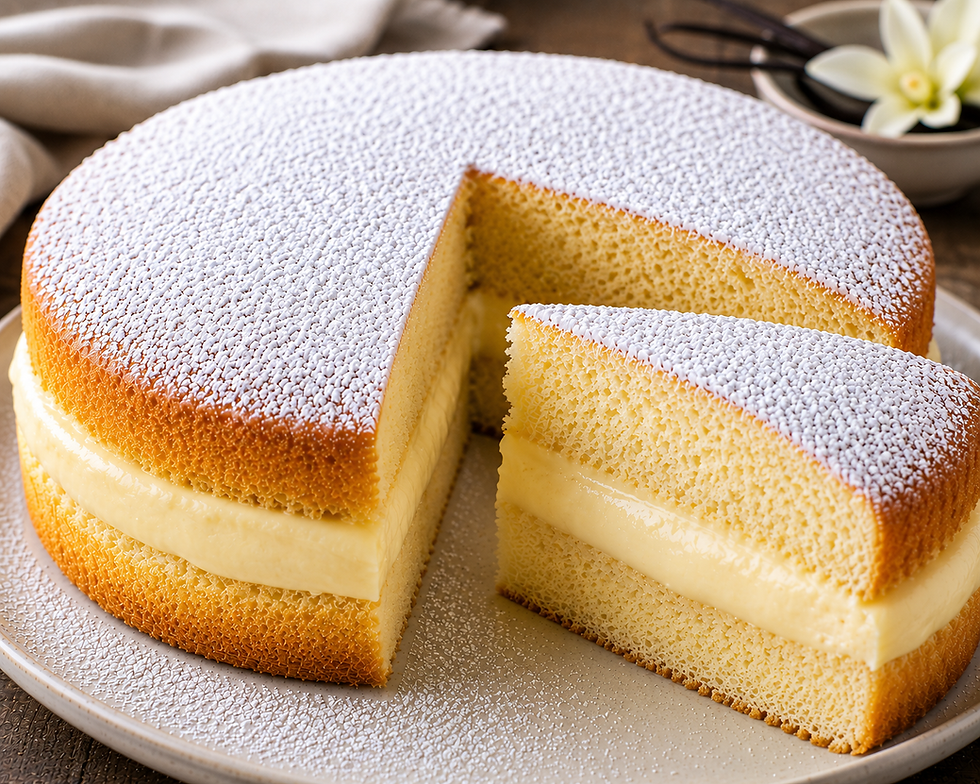
Serve the cake whole and dust it in front of people if you can, because the veil of sugar is the only visual event this dessert has and it is worth showing. A flat white cake stand, no doily, no chocolate sauce on the plate. The cake is round and pale gold with a dark seam through the middle, and that seam is the picture.
Cut wedges with a long thin blade wiped clean between cuts, and set each slice on the plate seam side up so the filling faces the diner rather than the tablecloth. Scatter four or five pieces of crushed toasted hazelnut beside the slice, never over it, where they would sit in the sugar and spoil the surface. Serve at room temperature with an espresso or a small glass of sweet wine, and nothing else at all.
Professional Technique
The technique that decides this cake is the one everybody treats as decoration: the dusting of sugar on top. A torta al latte carries a great deal of free water, and its baked surface stays faintly damp for days. Powdered sugar is finely milled sucrose with an enormous surface area, and sucrose is hygroscopic, which means it pulls water out of whatever it is resting on. Within half an hour the white veil has drawn in enough water to dissolve, and the snowy top is a transparent sticky patina. The cake has not failed. The sugar has simply done what sugar does.
There are two different products on the shelf and they behave nothing alike. Plain confectioners sugar is milled sucrose, with at most a trace of starch to stop it caking in the bag, and on a moist surface it surrenders in minutes. Snow sugar, also sold as non melting sugar or decorating sugar, is built for this problem: it carries a real proportion of starch, usually corn or wheat, alongside dextrose or maltodextrin. The starch granules take up the moisture first and bind it before it ever reaches the sucrose crystals, so the coating holds its opacity for hours rather than minutes. It is marginally less sweet with a faint floury note, which this cake does not miss.
Two rules govern the dusting: timing and height. Dust at the last possible moment, with the cake on its plate and the guests at the table. Then hold a fine mesh sieve or a small tea strainer at least 12 inches (30 cm) above the surface and tap the rim of it with your finger instead of shaking the whole thing. From that height the sugar separates in the air and lands as an even mist. Held close and shaken, it falls in clumps that wet through instantly and leave grey blotches. One pass, then stop.
Texture and Moisture Control
The crumb of this cake is made in the mixer, not the oven. Five minutes of whipping whole eggs with sugar builds a foam whose bubbles become the cells of the finished cake, and everything after that is a matter of not destroying them. Sifted flour folded in three additions keeps the foam intact; the same flour dumped in at once forces you to stir, which knocks out air and develops gluten at the same time. Three gentle additions produce a visibly lighter crumb.
The temperature of the milk matters more than its quantity. At around 140°F (60°C) it is warm enough to keep the melted butter fluid and dispersed evenly through the batter, so the fat coats flour and foam rather than sitting in pockets. Boiling milk cooks the egg proteins on contact and collapses the foam you just spent five minutes building. Cold milk resolidifies the butter into lumps that never distribute and bake into greasy patches.
Cooling is the last control. Turn the cake out after 15 minutes and cool it the right way up on a wire rack, uncovered, so the steam still inside it escapes through the top and sides instead of condensing against a solid surface. A cake left in its tin to cool completely steams itself and comes out with a damp band around the base. Ninety minutes on the rack is the minimum before splitting, and overnight is better.
Professional Mise en Place
Everything here can be staged well ahead except the dusting, which belongs to the last thirty seconds before service.
Equipment and tools
9 inch (23 cm) round tin, parchment disc, wire cooling rack
Stand mixer or hand mixer, large flexible spatula, fine sieve for the flour
Long serrated knife, ruler, small offset spatula
Fine mesh sieve or tea strainer kept dry, used only for the sugar
Prepared ahead
Cake baked the day before and left uncovered on the rack overnight
Hazelnut spread loosened with cream, covered, at room temperature
Hazelnuts toasted and crushed, stored airtight
Tin buttered, floured and lined before the eggs go into the mixer
Service setup
Cake split and filled up to 4 hours before, kept at room temperature
Sugar measured into the strainer and set beside the serving plate, not on the cake
Knife, hot water and a clean cloth ready for wiping between slices
Dust only when the cake is already on the table
Chef Tips
Weigh the flour if you can. A cup of all purpose flour scooped straight from the bag can weigh 40 g more than one spooned in and levelled, and in a batter this fluid that difference is the whole character of the crumb. Use the 215 g.
Take the hazelnut spread out of the cupboard, not the refrigerator, and stir in the two tablespoons of cream before you go near the cake. Straight from the jar it drags at a soft crumb and tears it. Loosened with cream it spreads with almost no pressure.
If you cannot find snow sugar, make a working substitute by blending 2 tbsp (16 g) of confectioners sugar with 1 tsp (3 g) of cornstarch until completely uniform. It is less durable than the commercial product but buys an extra twenty minutes, usually all you need.
Toast the hazelnuts yourself at 325°F (165°C) for 8 to 10 minutes and rub the skins off in a clean towel while they are still warm. Packet nuts have usually been sitting long enough to taste flat, and this cake has too few flavours to carry a dull one.
Common Mistakes
Dusting the sugar too early. Sugar put on an hour before serving will have dissolved into a transparent film by the time anyone sees the cake. Dust it on the table, seconds before cutting, and use snow sugar if the cake must stand at all.
Whipping the eggs for two minutes instead of five. The foam never reaches ribbon stage, the batter goes into the tin with a third of the air it needs, and the cake bakes low and close textured. Watch the ribbon, not the clock.
Pouring in boiling milk. Milk straight off a simmer cooks the egg proteins where it touches them and flattens the foam instantly. You will see the batter deflate in the bowl. Warm to about 140°F (60°C) and no further.
Stirring the flour in rather than folding it. Stirring develops gluten in a batter that should have none, and the crumb comes out heavy and rubbery. Fold from underneath, three additions, and stop as soon as the flour disappears.
Splitting the cake while it is still warm. A warm milk cake is fragile and the knife tears it into two ragged halves instead of two flat ones. Give it 90 minutes on the rack at the very least, and score a guide line all the way around first.
Wine Pairing
Moscato d'Asti DOCG: The Piedmontese answer to a Piedmontese filling, and the easiest bottle on the list. Around 5 percent alcohol, gently sweet, with a low pressure sparkle and peach and sage aromatics. The carbon dioxide clears hazelnut fat from the palate between mouthfuls, and its sugar sits just below that of the cake, so the cake never tastes flat. Serve at 43°F (6°C).
Brachetto d'Acqui DOCG: A sweet lightly sparkling red from the same corner of Piedmont, all strawberry and rose. Its faint tannin and red fruit engage the cocoa in the filling directly, which no white wine can do, while the bubbles and the low alcohol keep the match from turning heavy against a cake this rich.
Recioto di Soave DOCG: Made from dried Garganega, so the sweetness arrives with genuine acidity and a bitter almond note behind it. That acidity is what cuts a filling which is largely fat and sugar, and the almond bitterness runs alongside the toasted hazelnut rather than competing with it.
Vin Santo del Chianti Classico DOC: Years of oxidative ageing in small caratelli give dried fig, walnut and a firm grip that carries cocoa and nut without being swamped by them. Its sugar is held in check by noticeable acidity and alcohol, so the pairing stays bright instead of cloying. Small glass, cool, not cold.
Marsala DOC: The fortified Sicilian, in a Superiore Dolce bottling. Higher alcohol strips hazelnut fat from the palate faster than any unfortified wine can, and its caramel and dried apricot character echoes the cooked milk in the crumb. Pour small measures and keep it at cellar temperature.
Storage & Reheating
The filled cake keeps under a cake dome or loosely covered with foil at cool room temperature for 3 days, and it is genuinely better on the second day than on the first. Do not refrigerate it: the crumb firms and dries in the cold and the hazelnut filling sets hard, and neither recovers fully even after an hour back at room temperature. If your kitchen is very warm, refrigerate it and then give the cake a full two hours out before serving.
Unfilled layers freeze well. Wrap each half in plastic and then in foil and freeze for up to 2 months, then thaw wrapped at room temperature for 3 hours before filling. The filled cake freezes less happily and is best avoided. A slice that has gone a little dry is very good warmed for 10 seconds in a microwave or 4 minutes in a 300°F (150°C) oven, though the sugar on top will disappear, so dust it again afterwards.
Nutrition
Per serving, based on 10 slices:
Calories: 420 kcal
Total Fat: 21 g
Saturated Fat: 8 g
Trans Fat: 0 g
Unsaturated Fat: 12 g
Cholesterol: 65 mg
Sodium: 180 mg
Total Carbohydrates: 51 g
Fiber: 2 g
Total Sugars: 33 g
Added Sugars: 30 g
Protein: 7 g
Lactose: 2.5 g
Principal micronutrients: calcium, vitamin E, magnesium, phosphorus, riboflavin
These figures are estimates and move with the brand of spread used.


Comments